Stupid FAST Bastion
The most basic Bastion you can build
Requires firstBasic Training · Basic Training badge
The purpose of this training is to familiarize you with our standardized bastion design. This is the most basic bastion you can build that provides us with adequate protection and fighting positions.
It's simple, and made up of many essential building elements that you can implement in future builds once you understand their usage.
It's modular, you can extend it with as many towers as you like. You can build it with 1 tower for small teams/FOBs or 5 towers for super FOBs. More complex additions and modifications will be covered in future trainings as we continue to identify best practices through shared experience and collaboration.
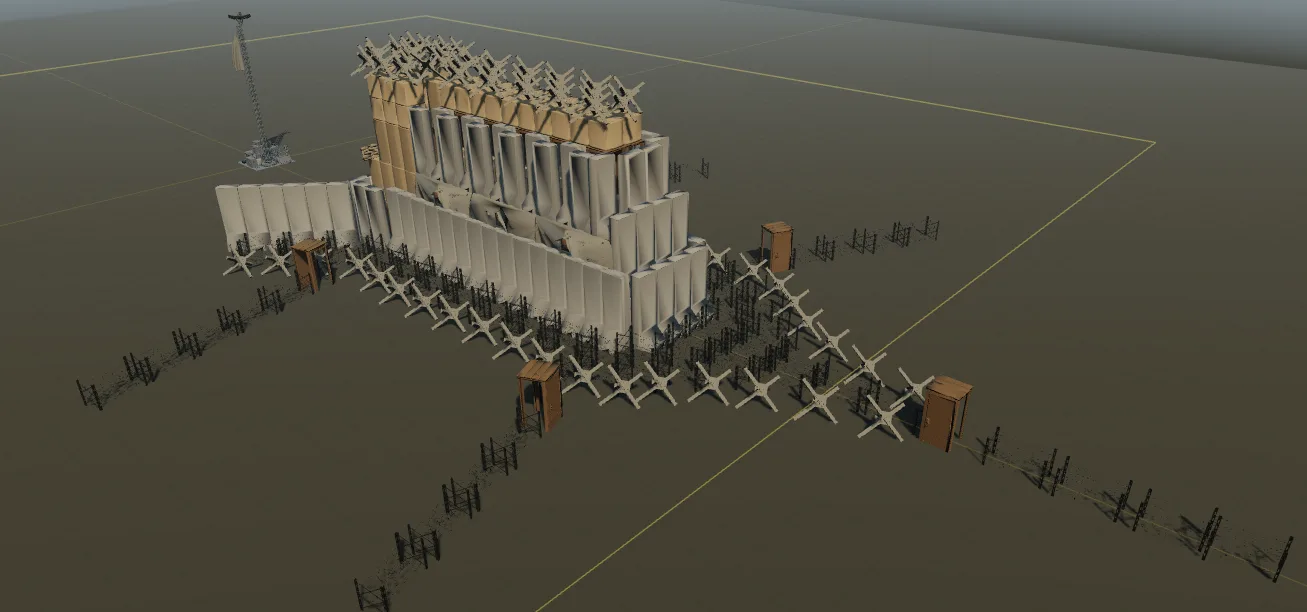
you can view the blueprint here
👉Wardogs.zone build link 👈 - First Phase
👉Wardogs.zone build link 👈 - Second Phase
Build cost
Before exterior wire and tank traps, roughly 3.8k.
Fully built to spec - 5.2k
The following is a set of step by step instructions presented in a style similar to a graphic LEGO build manual, where we add a single layer at a time in a specific order based on priority and currently known bug avoidance. Some additional commentary is included to explain construction methods and the purposes of each structural element.
Part #1 Stage #1: Initial Footprint
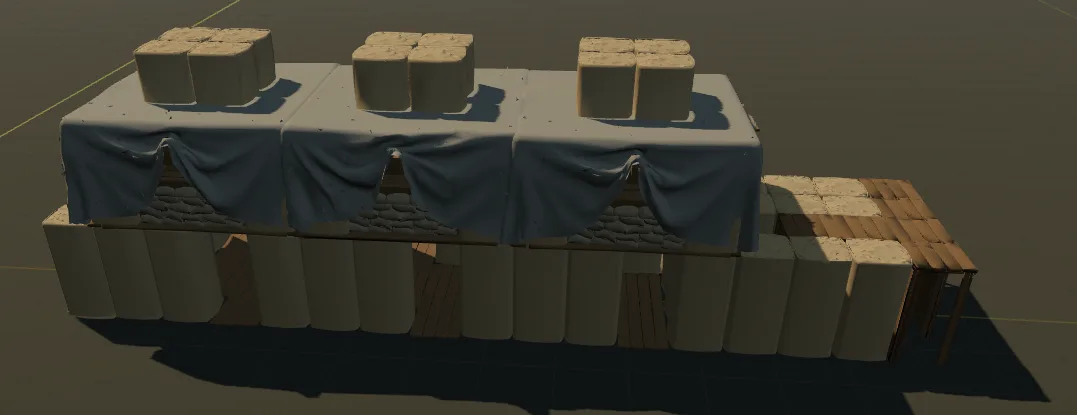
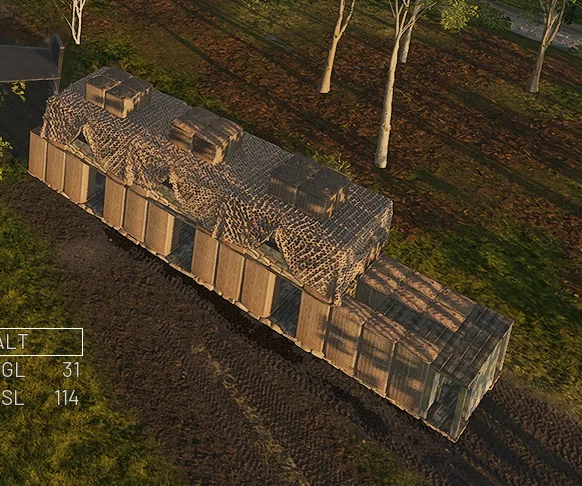
Very simple. Modular design.
Standard 3x Recon Towers, can be reduced or extended to fit the need.
4x Large Hesco Wall at the tip
9x Large Hescos in 3 rows at the base, extending towards the FOB center, leave a gap in line with the ladder for access.
6x Doors, 2x within the gap of the Large Hescos, and 4x along the base of the bastion.
The door closet to the ladder will be oriented with the door to the ladder.
The door directly behind it will be turned in the opposite direction.
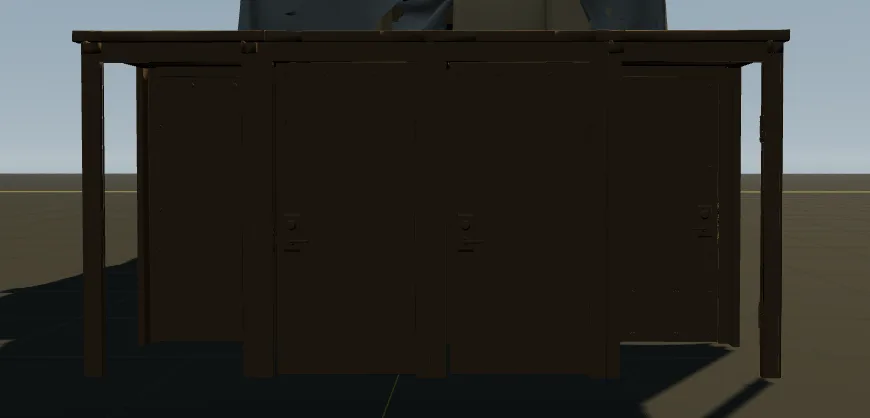
The 4x doors at the base will be oriented as shown below. This is our only entrance into the bastion, and provides unobstructed access to the ground level Bremmer peaks along the sides of the bastion walls. (These peaks are added in Part #1 Stage 3)
Warning:
Do not fill in the bottom of the towers with hescos yet.
As of now, the build can bug out and you'll get a "Stack limit Reached" error when placing the bremmers on top of the tower.
Bastions should ideally be placed on ground that has a slope of less than one full block along it's length. Always start placement from the higher end of the bastion.
If we can place the entire bastion while only relying on the sandbag underfill, we can avoid having to use the complex workaround presented at the end of this article.
Part#1 Stage #2: Capping the Tip and Base end Height
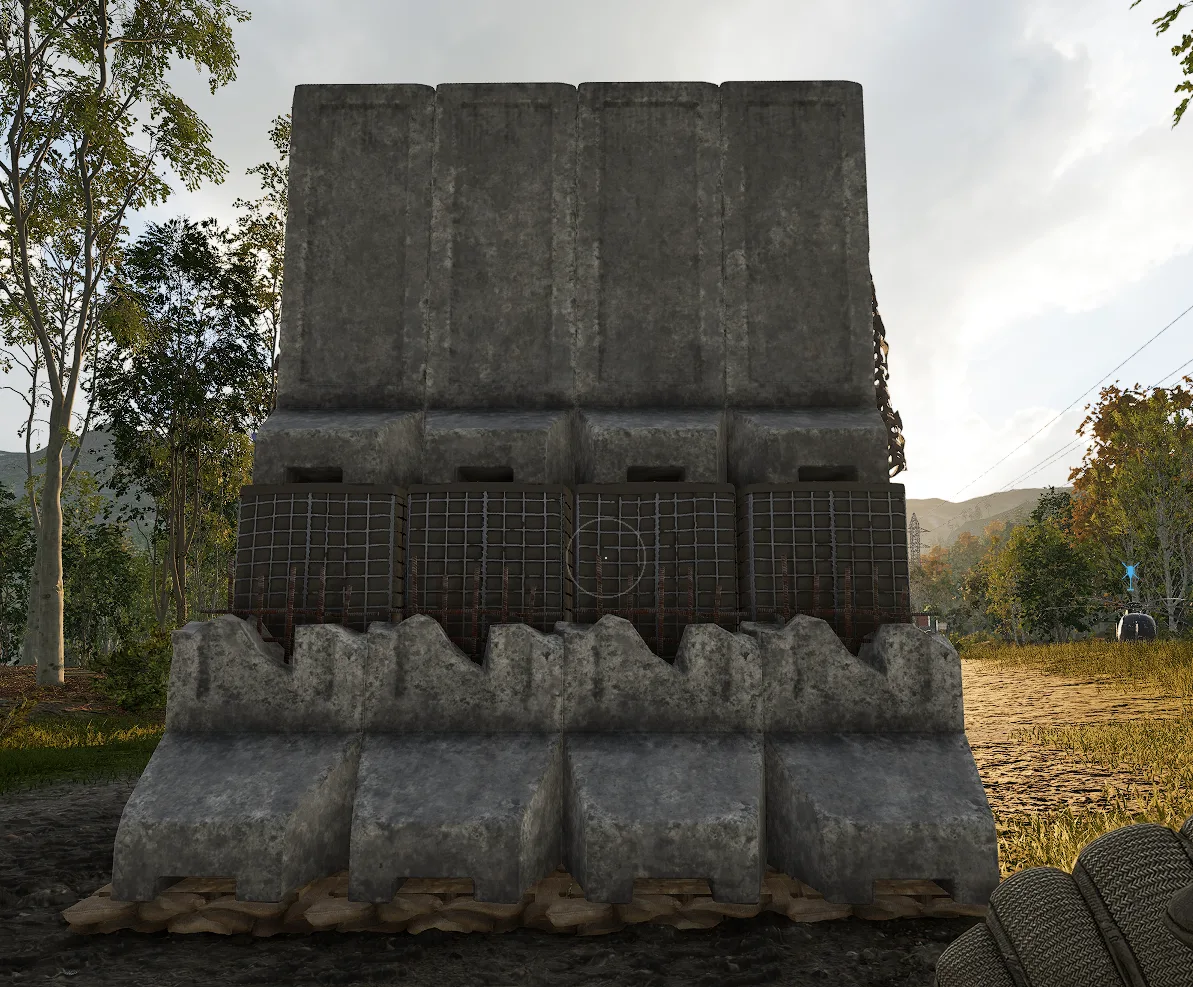
Place 8x Bremmers on the face of the bastion.
4x on top of the existing 4x wide Large Hescos.
4x on ground level directly in front of the existing 4x wide Large Hescos. You're going to use the blueprints of these as scaffolding so you can see the yellow X on the upper ones. You can either build these after using them as scaffolding or wait until the rest of the lower Bremmer wall is added in Part #1 Stage #3.
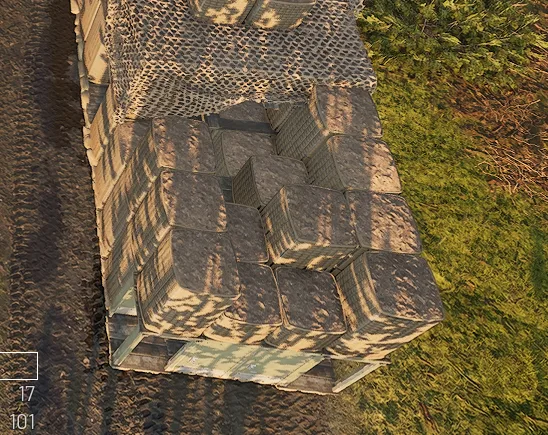
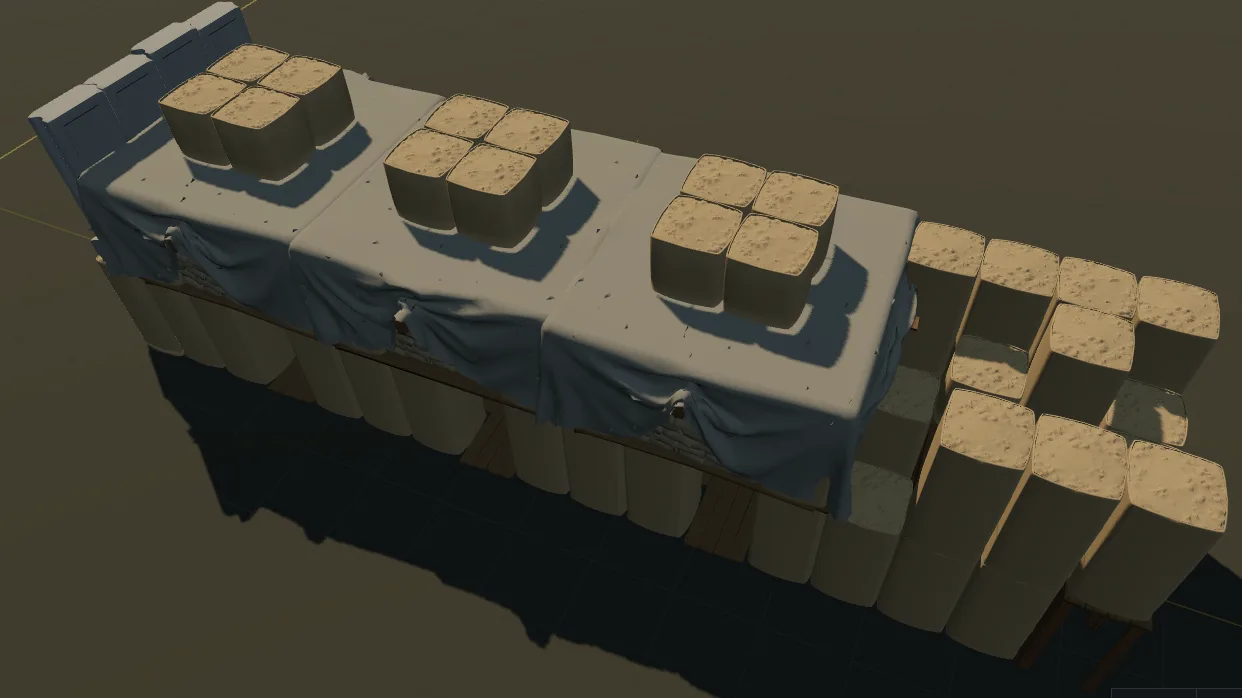
Place 8x Large Hescos.
Place 4x Small Hescos in the remaining open spaces.
The small hesco closest to the Recon Tower is our step that we will vault from to access the upper Bremmer peaks that will be added in Part #1 Stage #3.
Warning:
Do not fill in the bottom of the towers with hescos yet.
As of now, the build can bug out and you'll get a "Stack limit Reached" error when placing the bremmers on top of the tower.
Part #1 Stage #3: crenelations, Fill, & Encasement
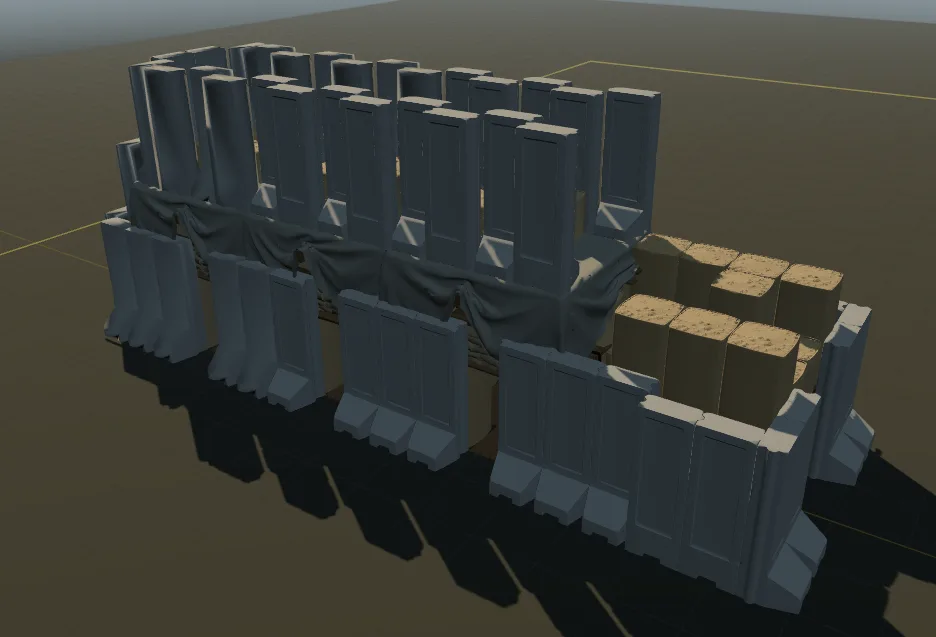
Next is the crenelations.
These are arrow slits for you to fire down the wall of the fort. They only give you a 45 Degree angle of fire though, you can't fire directly out from the bremmers. This is proper bastion design. Maximum protection to cover the Fort walls.
These will be the primary fighting positions as they offer the most protection and lowest angle of fire along the walls.
Bastions are weakest at their tip. This is because if an enemy gets a firing angle on the length of the bastion, they can rake fire the entire bastion killing all defenders.
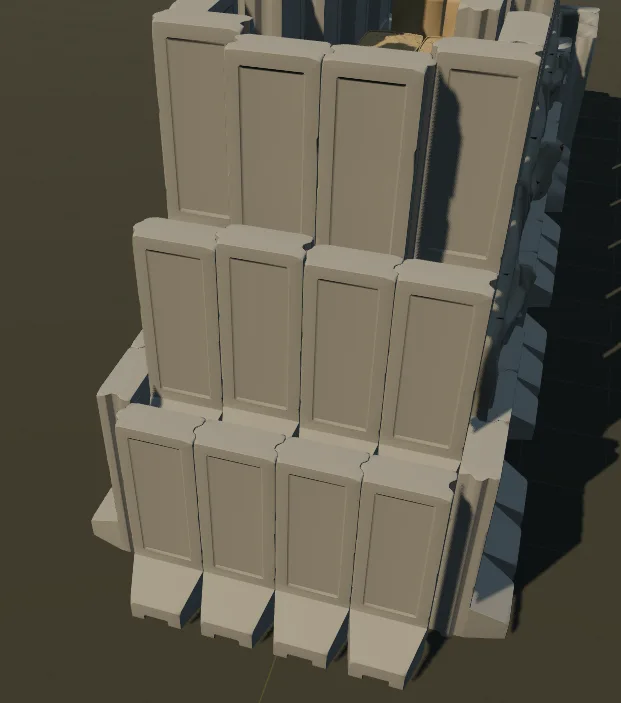
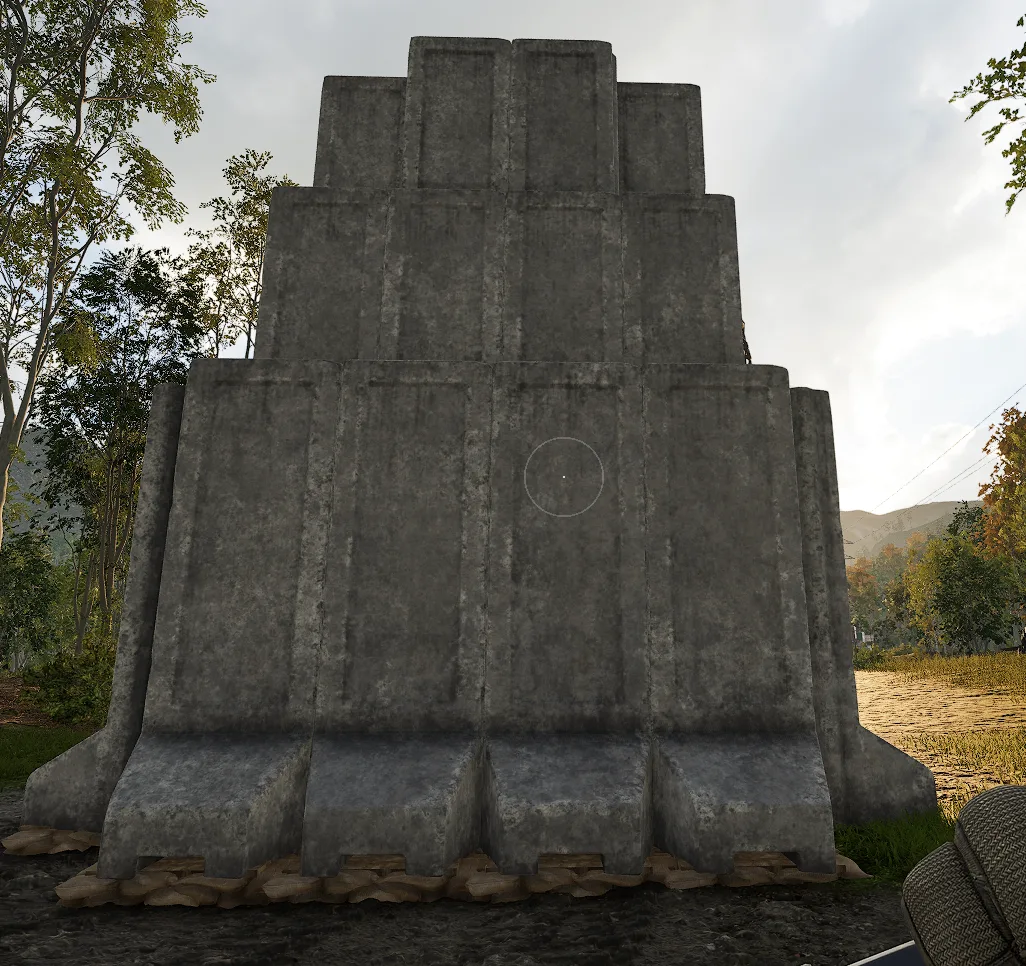
For this reason, BASTIONS ALWAYS BLOCK THE TIP OF THE BASTION. You should NEVER be able to see directly out from the tip of the bastion.
Crenellations:
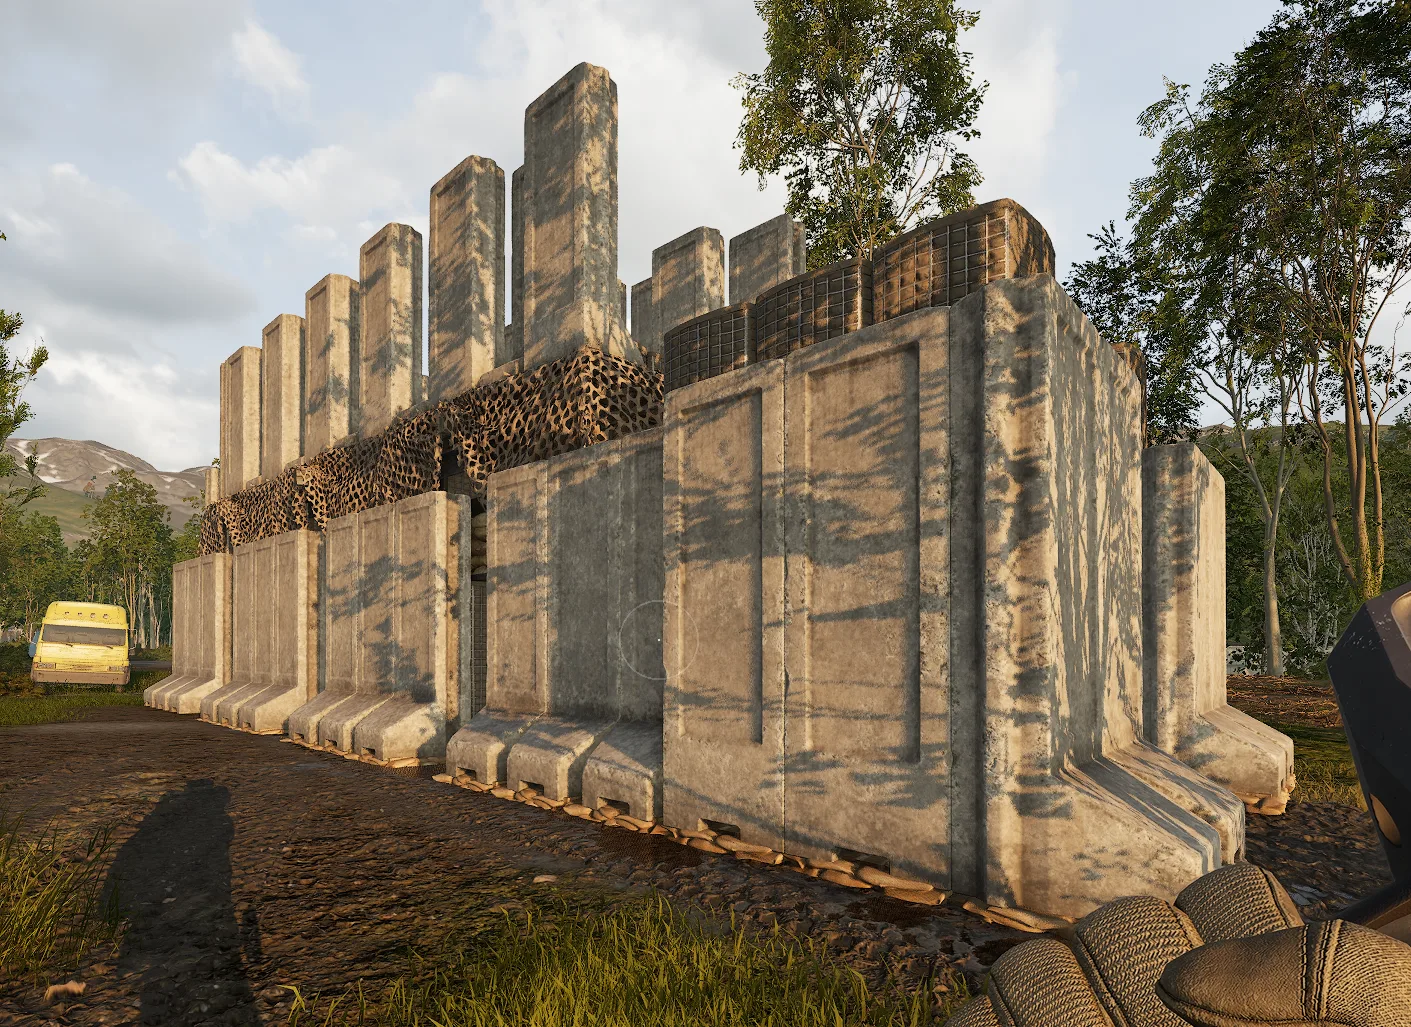
4x Bremmers are to be placed on the front edge of the outermost Recon Tower.
Middle 2x Bremmers will be oriented with their toe in towards the base of the bastion, flat face out towards the tip.
Outer/corner 2x Bremmers will be oriented with their toe facing out towards the tip of the bastion, flat face facing in towards the base.
This provides us with peaks that look towards the left and right sides of the bastion rather than ones that look out in line with the length of the shaft. It's essential to get this orientation correct or you could potentially give the enemy a LOS straight down a significant portion of the hallway rather than just the 2 or 3 squares right at the tip.
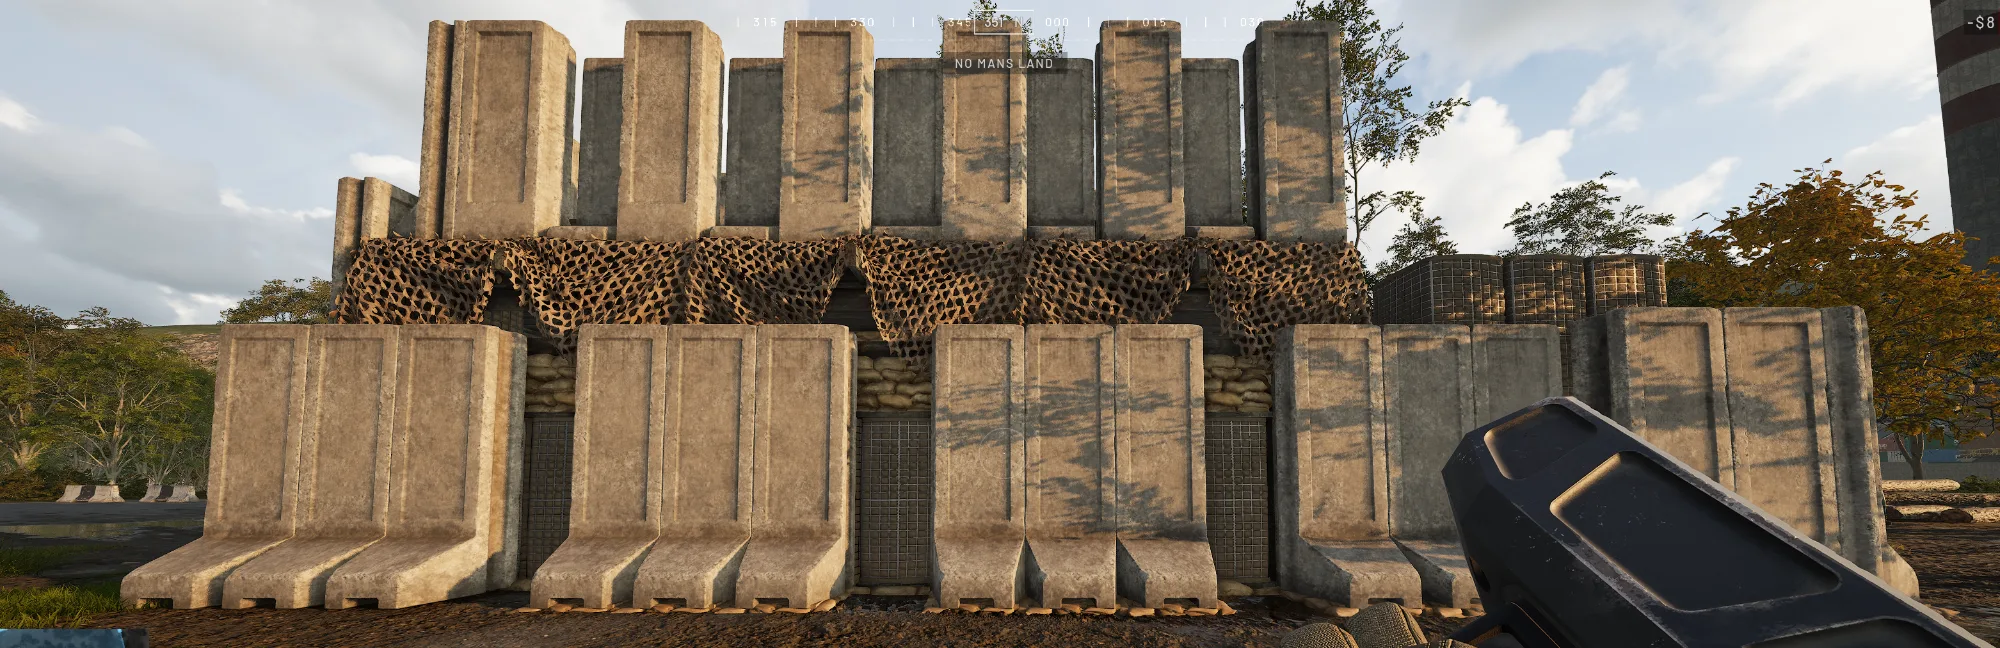
22x Bremmers, 11x per side placed in an alternating pattern. (Variable based on how many Recon Towers are used, +/- 4/8 per)
Your first and last Bremmers MUST be placed with their toe facing in towards the centerline of the bastion and their flat face facing away from the centerline of the bastion.
This orientation is crucial so that your peak nearest the base is looking outwards, and your peak nearest the tip is looking inwards.
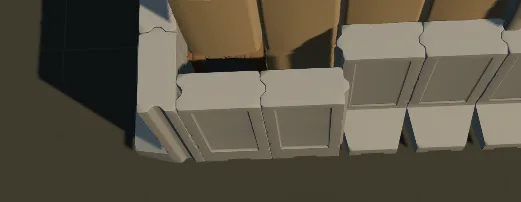
Fill & Encasement:
6x Large Hescos to the bottom floor of each Recon Tower (standard bastion will require 18x).
36x Bremmers placed around the perimeter.
Leave gaps to allow the undersides of the Recon Towers to be fille dconcurrently.
All Bremmers will be placed with their toes facing out except for the 2x rearmost Bremmers along each side closet to the base, these will be oriented the opposite direction to create peaks that can be used to clear the walls of the bastion.
Warning:
ONLY fill in the bottom of the Recon Towers with Large Hescos AFTER the upper level bremmer crenellations have been placed/built.
As of now, the build can bug out and you'll get a "Stack limit Reached" error when placing the bremmers on top of the tower.
If the bastions are not placed on generally level ground and you can't snap the Bremmers to the Recon Towers at some point due to them being unsupported, use free place and gradually step the Bremmers down rather than waiting until you can't place one and having a single large step.
Large height differentials between adjacent Bremmer walls with their toes accessible to the enemy can present a huge jump risk. Best practice is to not let the sandbag underfill reach above approximately knee height. This can be identified by looking straight ahead while looking at the toe of the Bremmer, if the top of the toe is at or above your hands, then the differential is too much. When in doubt, always jump test your walls!
Part #1 Stage #4: Filling the floor and closing the face of the bastion
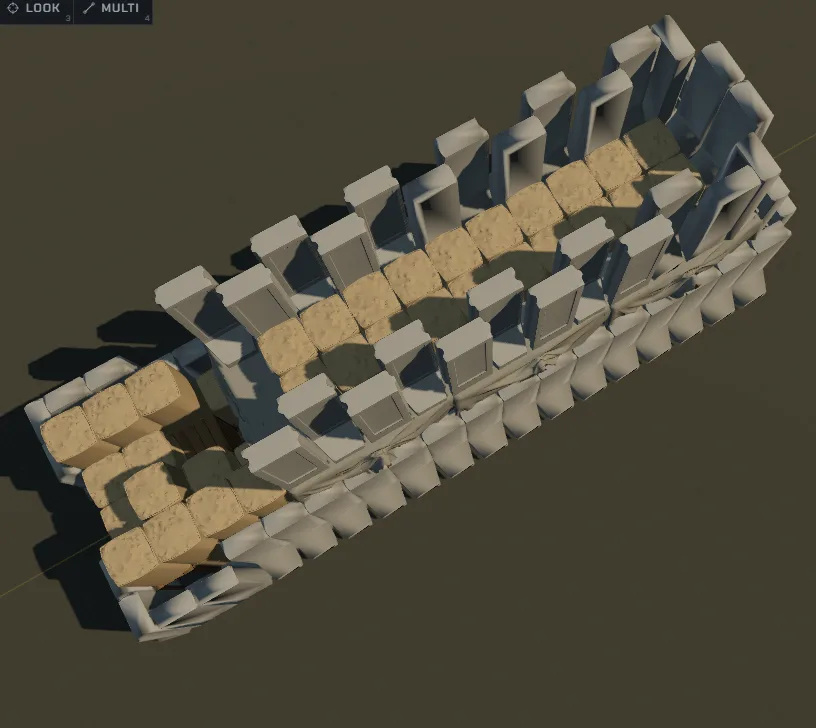
Filling the Floor:
Place 8x Small Hescos on the edges of the Recon Tower roofs between the existing included small hescos.
These tend to be on a slightly different level than the existing ones that are part of the recon towers. This can cause some issues with the doors for the hallway added in Part #1 Stage #5 and the Small Hescos placed on top of them in Part#2 Stage #1.
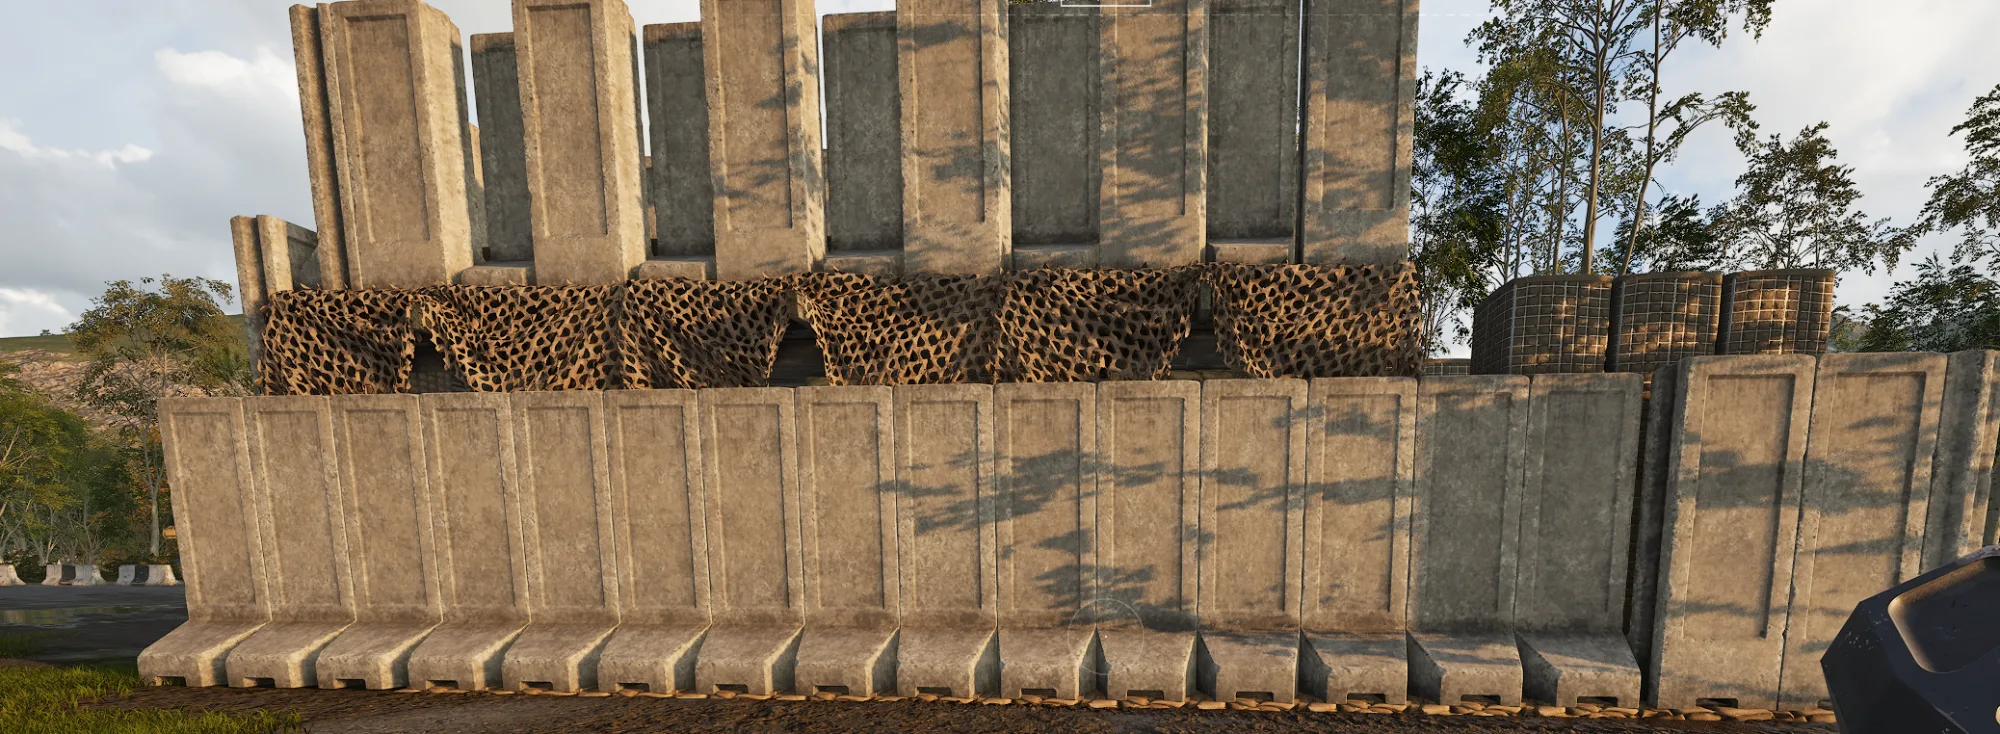
Closing the face of the bastion:
Place 6x Bremmers in the gaps that were initially left to access the bottom floors of the Recon Towers.
Warning:
As of now it's not known if you can get the Small Hescos to snap on the same level as the existing ones included in the Recon Towers. If you can, you can avoid potential issues that will come up in the next few steps, if you can't then there are a few additional things you need to be mindful of while completing the top cover.
Part #1 Stage #5: Crenellation Hallway, base end build-up, & wing walls
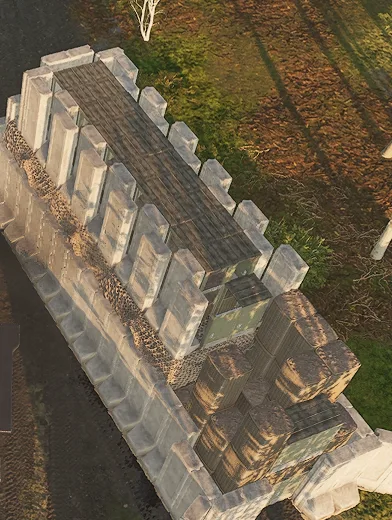
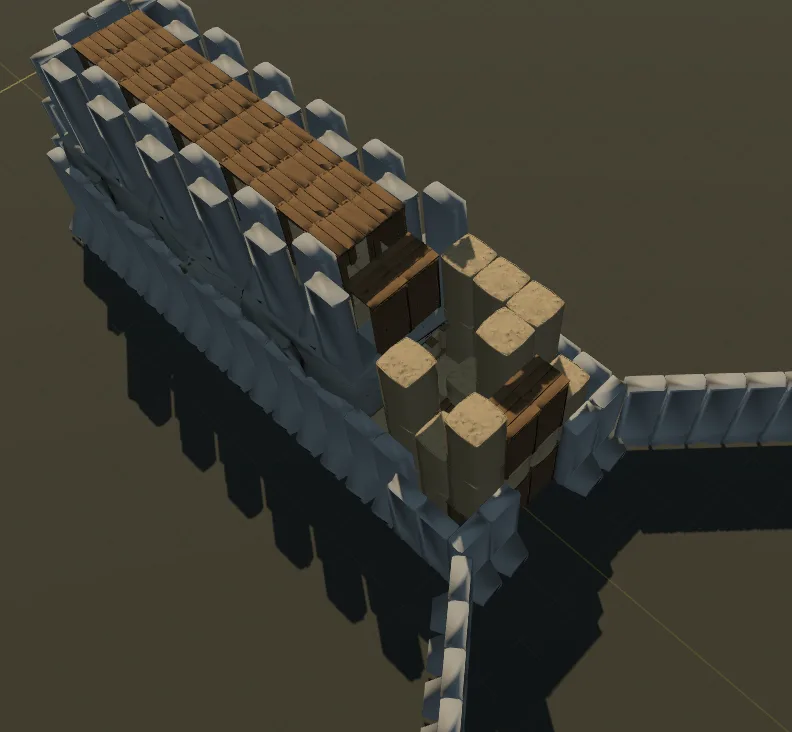
Wing Walls:
At this point, we can begin to fully enclose the base by connecting the bastions with a single row of Bremmers with their toe facing outwards. The method for this will be covered in a separate training (Placing Perfect Walls).
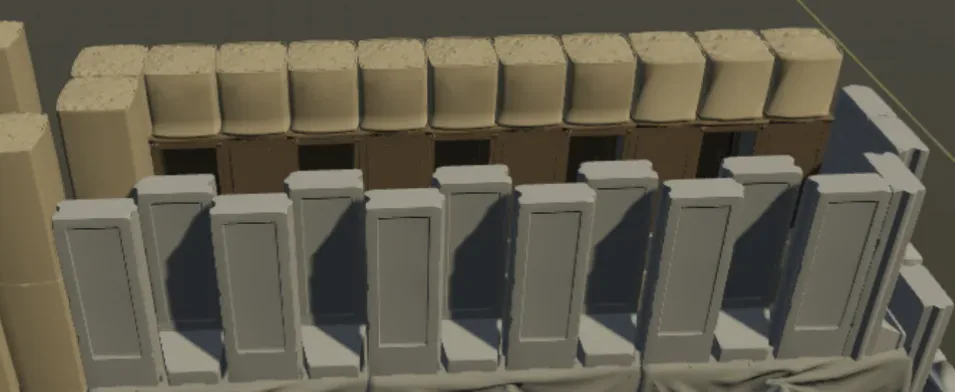
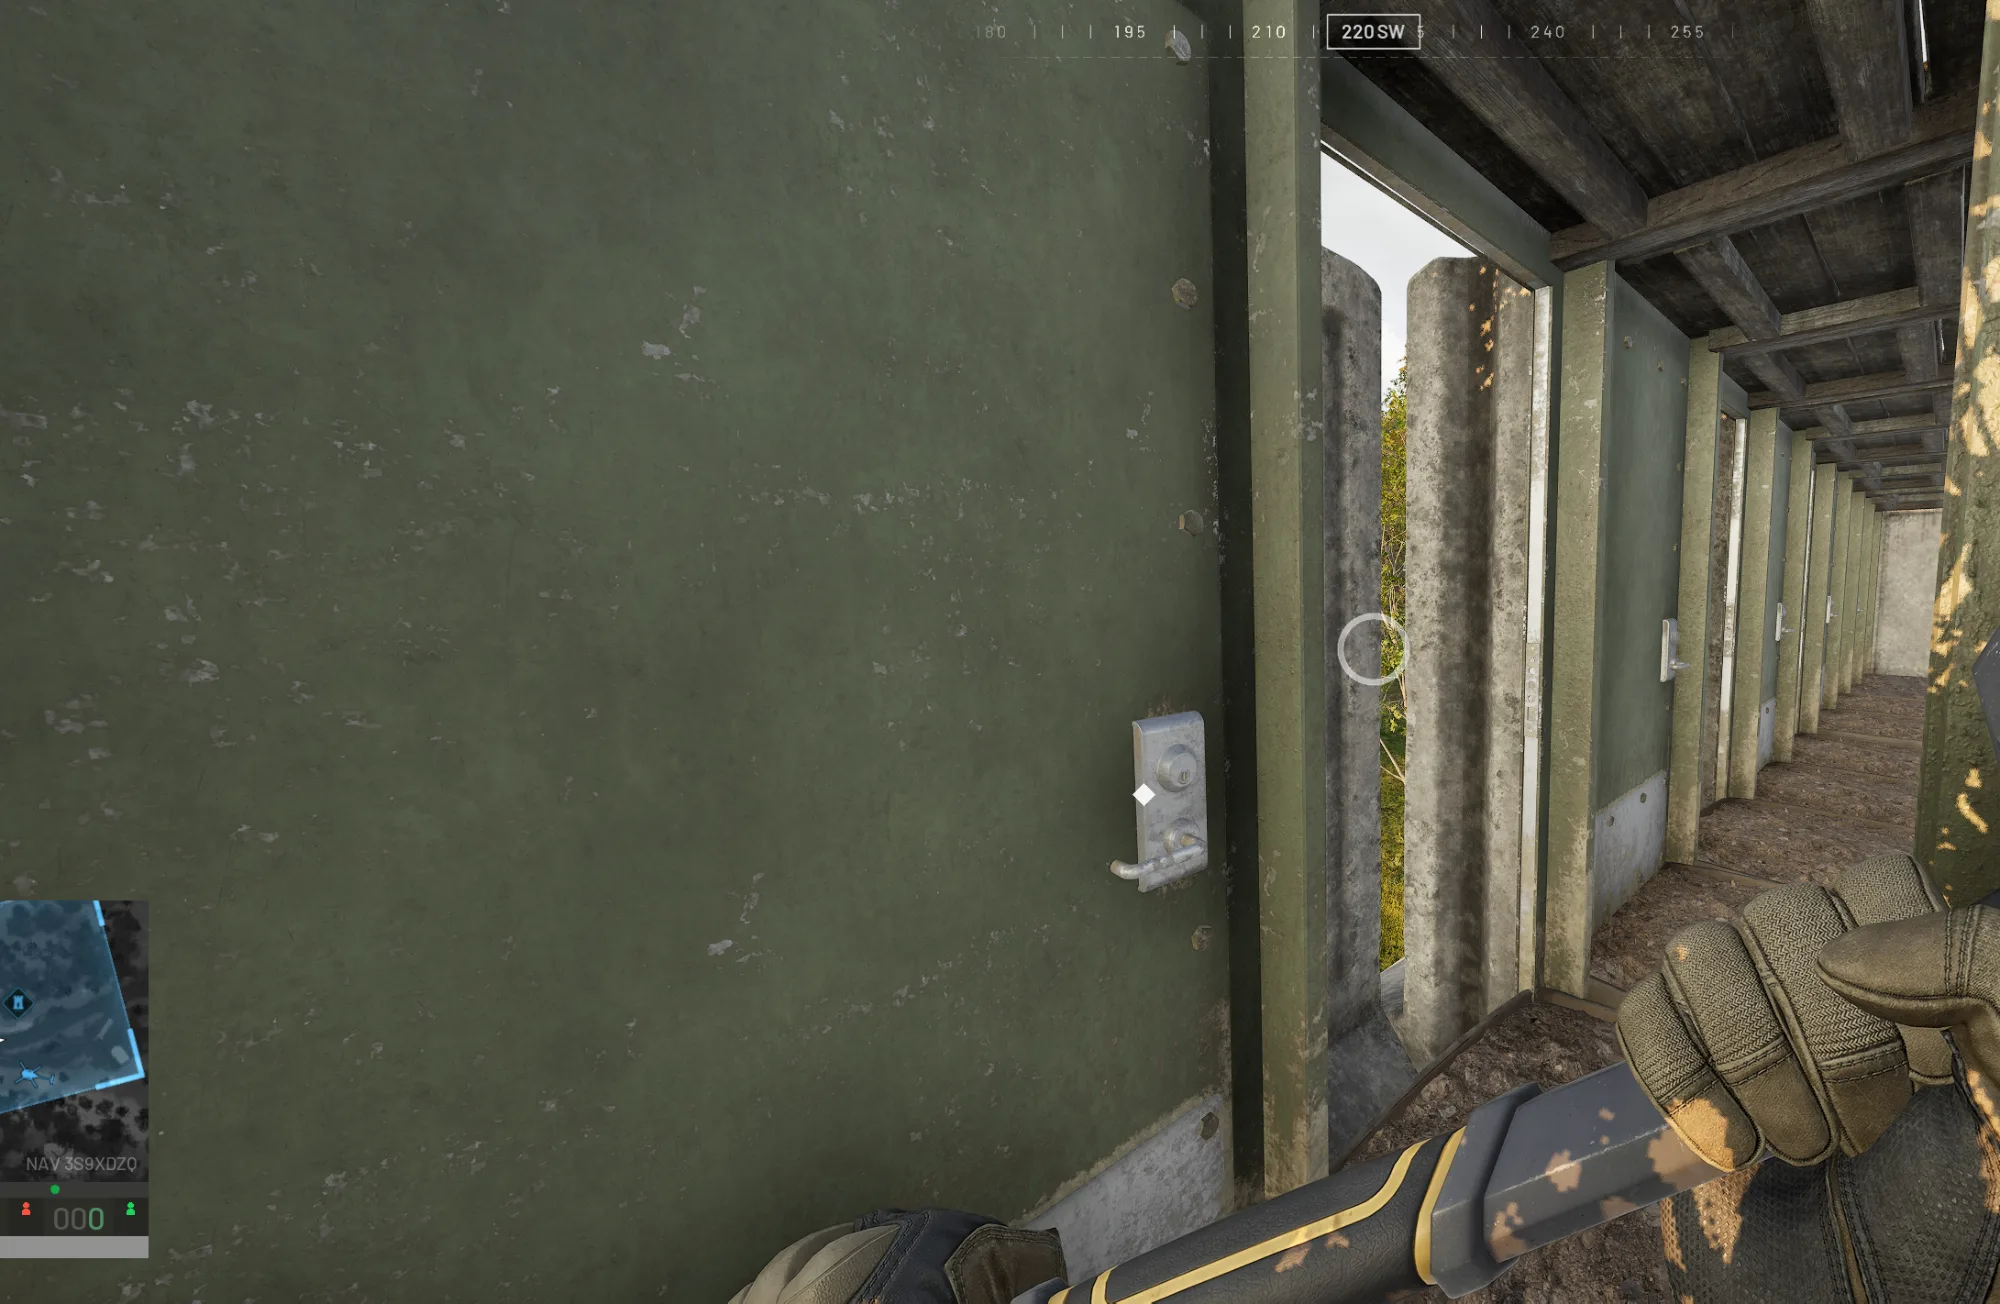
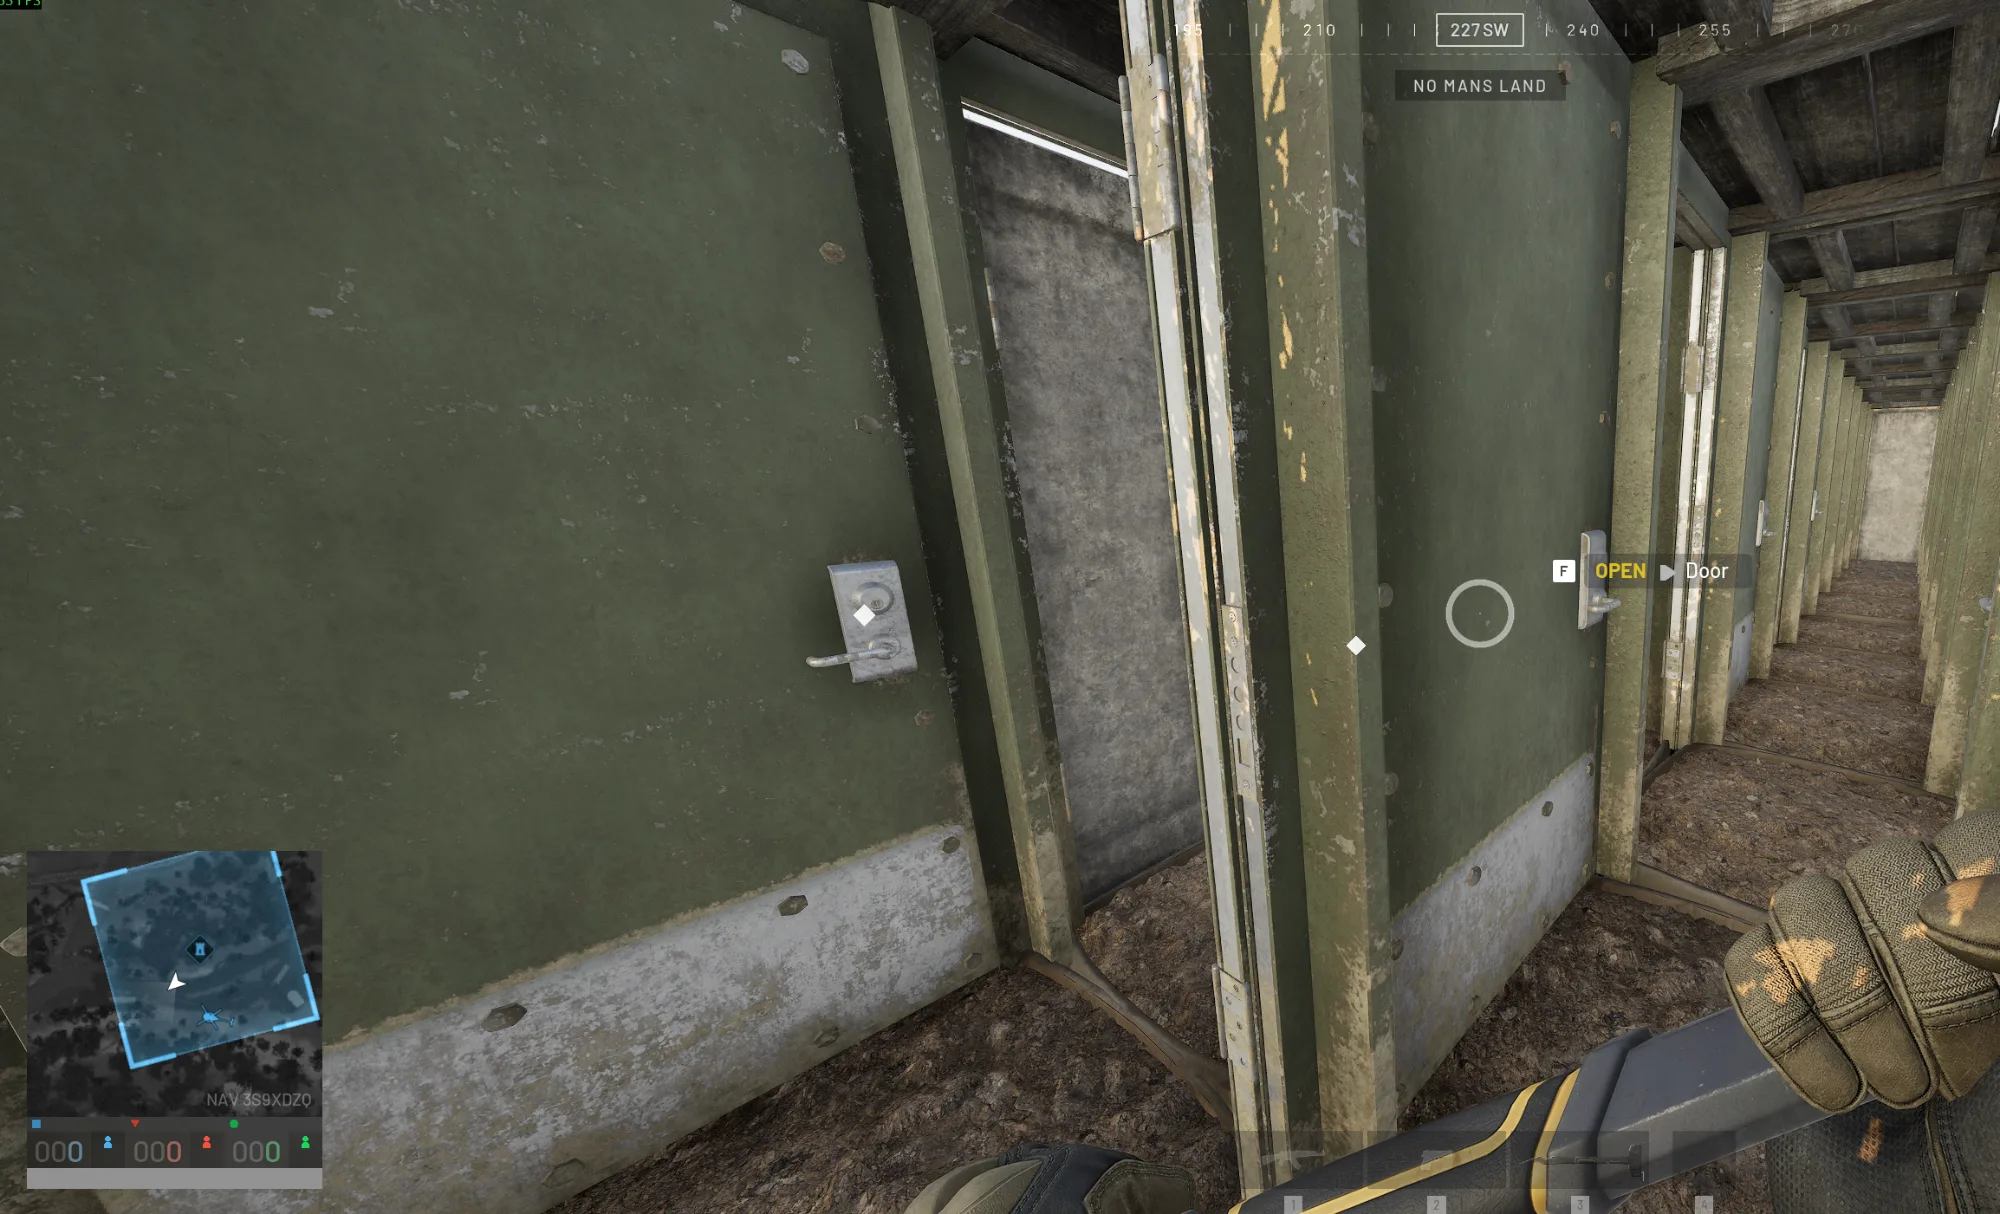
Crenellation Hallway:
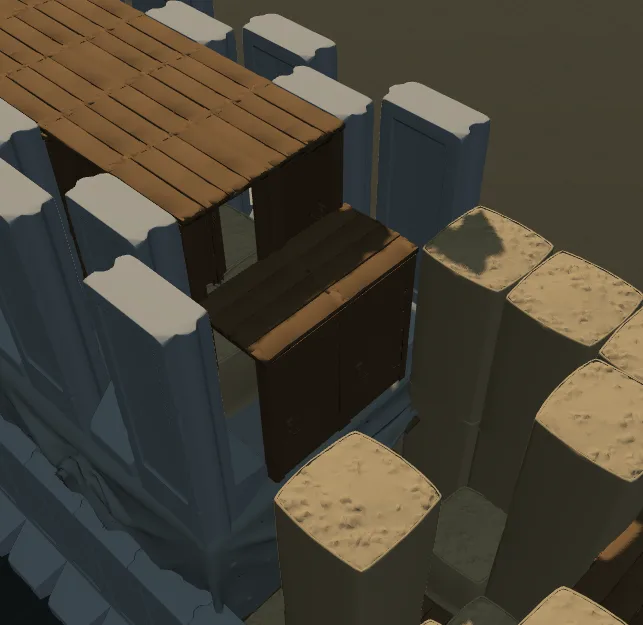
Place 20x doors on the upper level to provide a roof structure.
These will alternate facing to the right and left relative to the axis of the bastion.
When placing these doors, you may be able to snap them to 2 separate very close locations. One will be directly to the Small Hesco, one will be to the adjacent doorway. This is due to the slight height difference between the Small Hescos included in the Recon Tower and the Small Hescos placed in Part #1 Stage #4. If you can get them all to snap to the same level, you can prevent some potential headaches in Part #2 Stage #1.
If the Bremmer wall is flat face in (toe out), you will place the door against it.
If the Bremmer wall is flat face out (toe in, "the peak pocket"), you will face the door to the center.
Upper Level Entrance Doors:
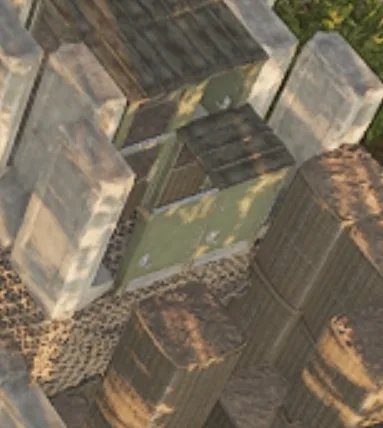
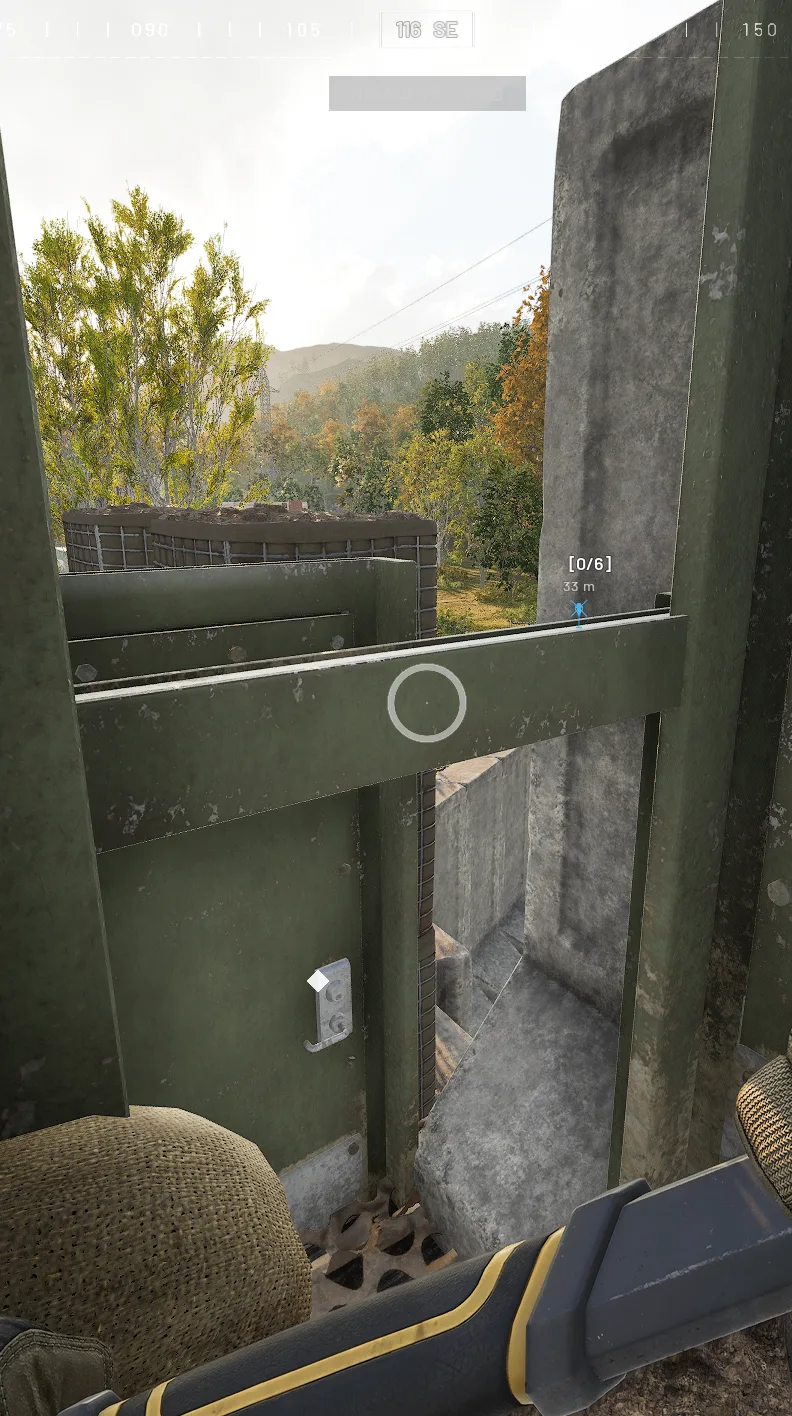
Place 2x doors at the back edge of the Bremmer crenellations directly on the roof level of the Recon Tower. These will be Faced towards the base of the bastion.
Destroy the roof of the door on the left hand side (when looking down the length of the bastion towards the tip) to be able to access the crenellations hallway. To exit the crenellations you will have to crouch under the doorframe.
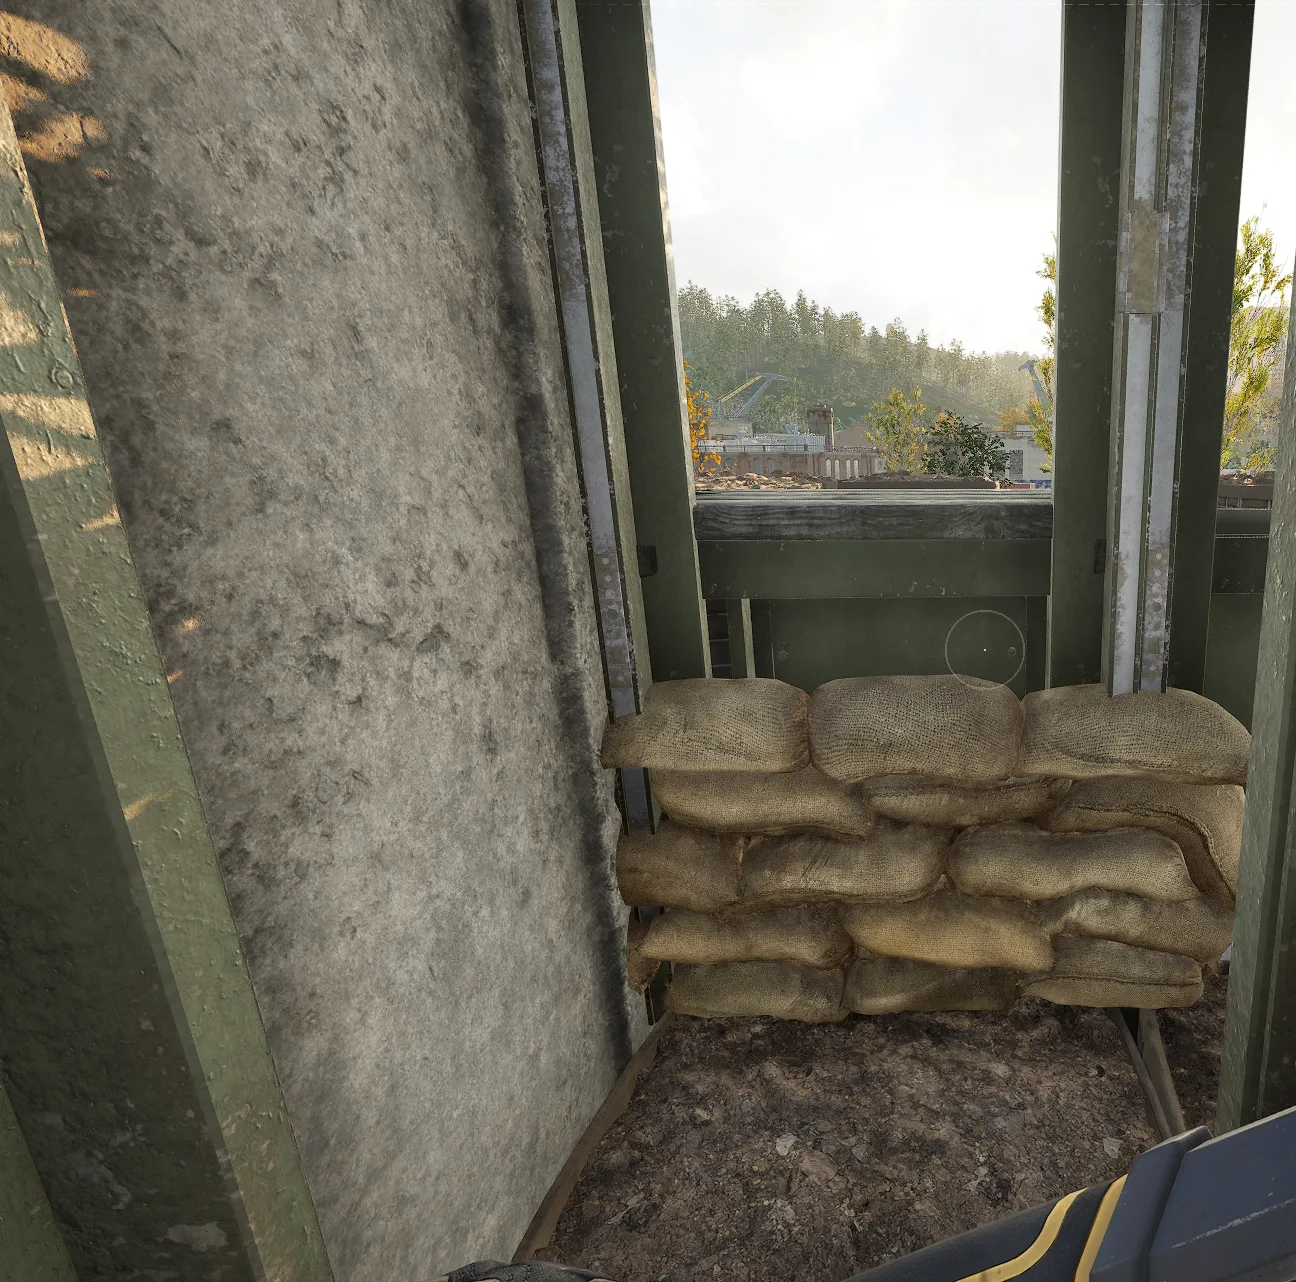
Sandbag on Nonjump-Up Door:
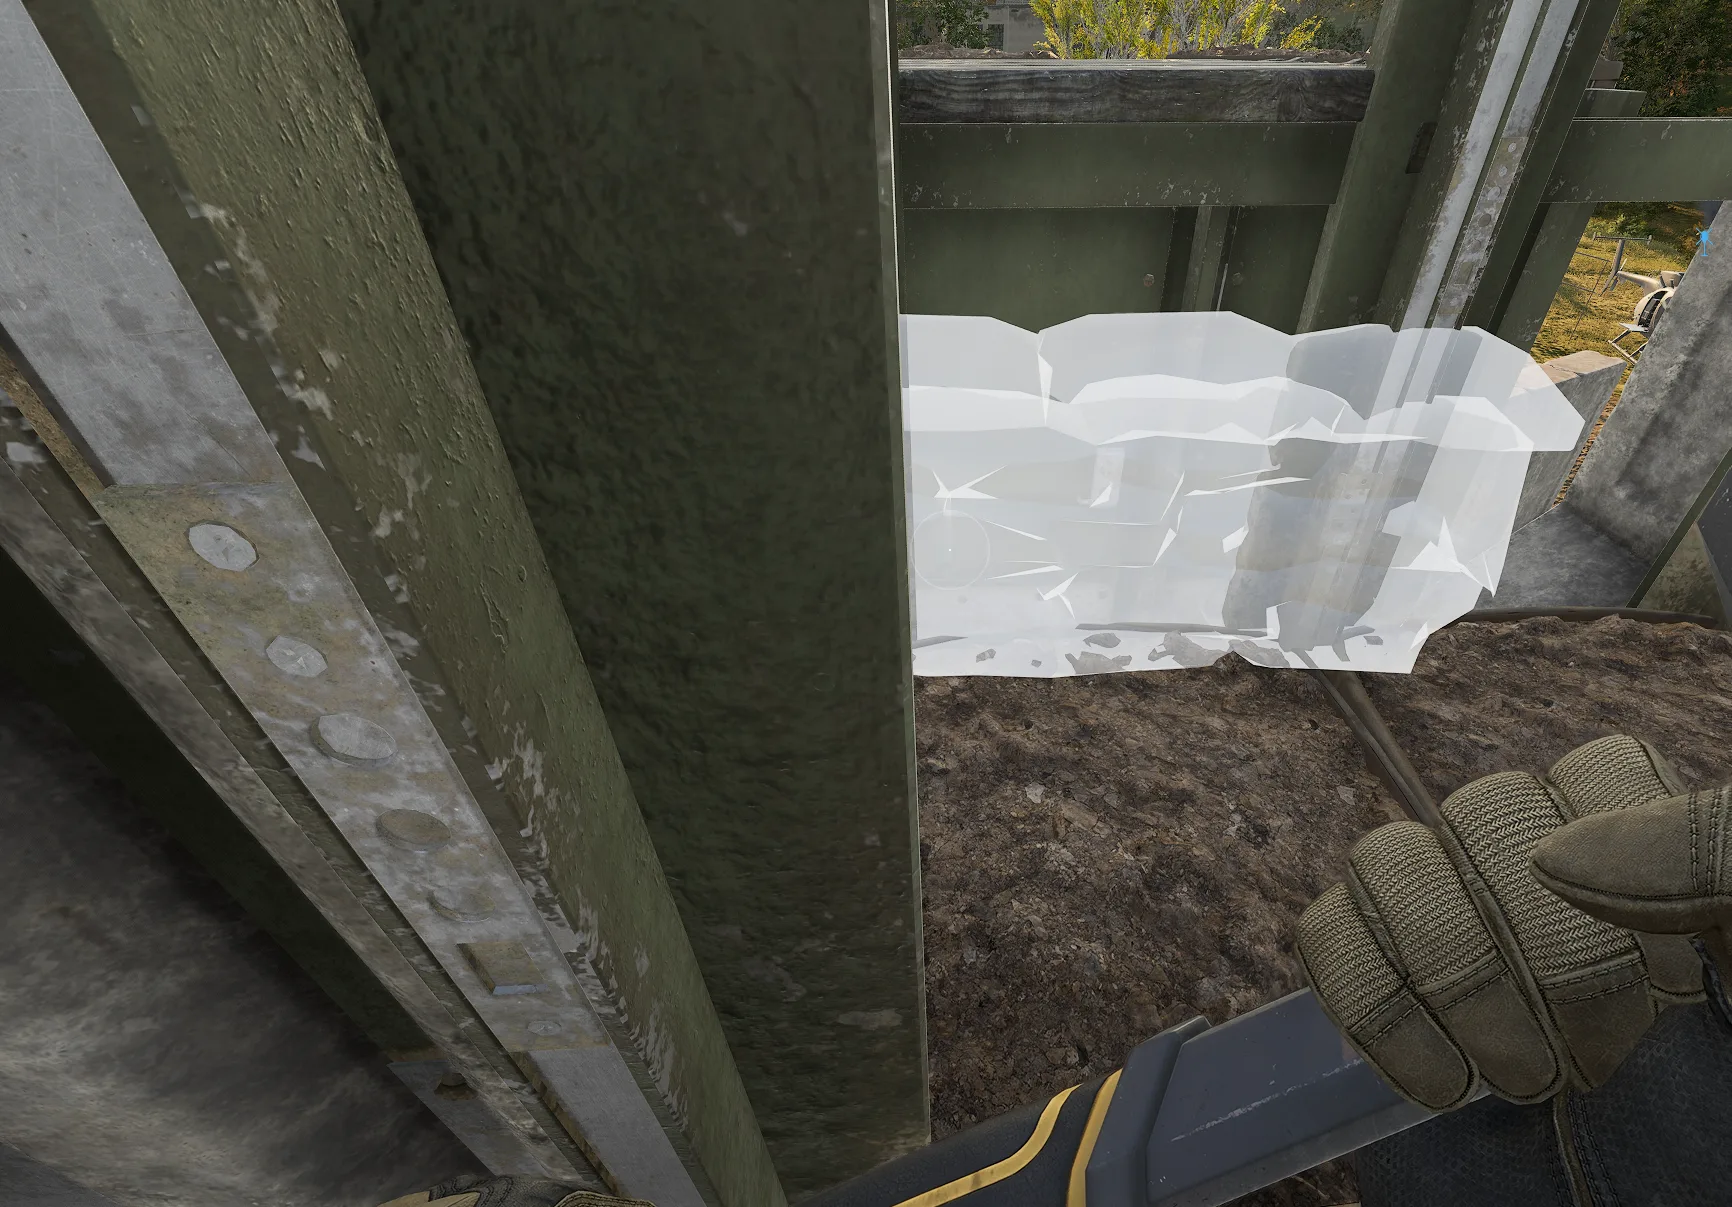
Standing in the left lane of the hallway (facing towards the base of the bastion), open the last door on the left, place the sandbag as far to the left as you can, it's a limited pixel gap so you'll need to wiggle it around some.
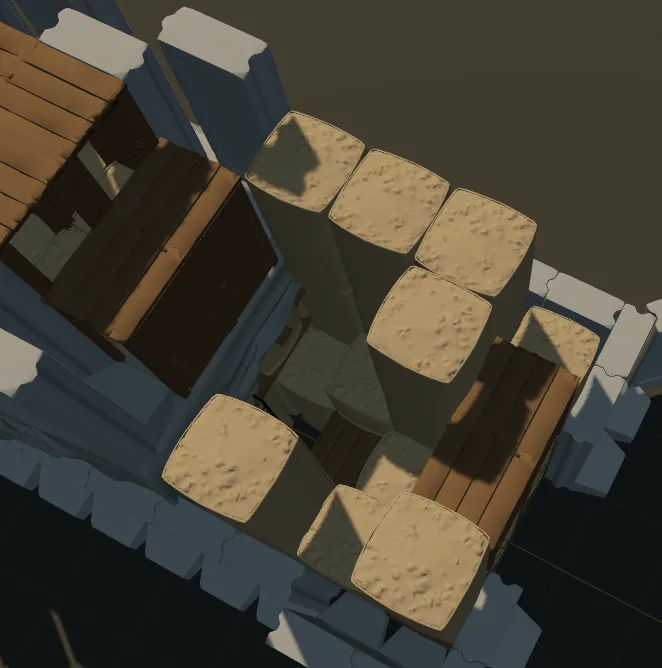
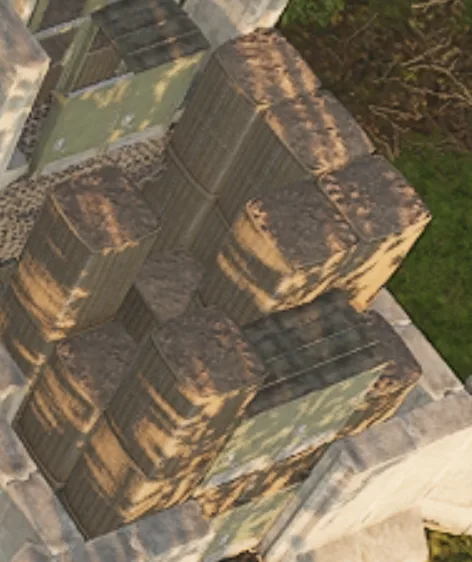
Base End Build Up:
Place 6x Large Hescos to raise the walls of the bastion base section as shown above.
Place 2x Doors on the center two blocks on the rearmost line of the bastion.
Face the doors outwards.
Part #2 Stage #1: Mortar Cover Hesco Base & base end Build-Up
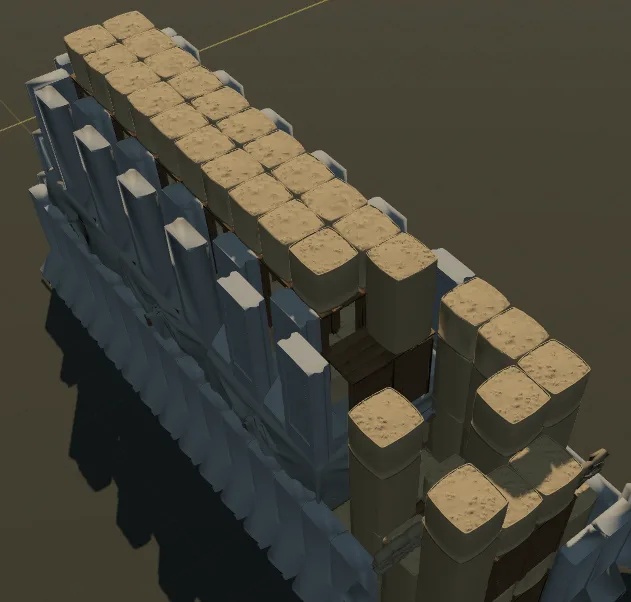
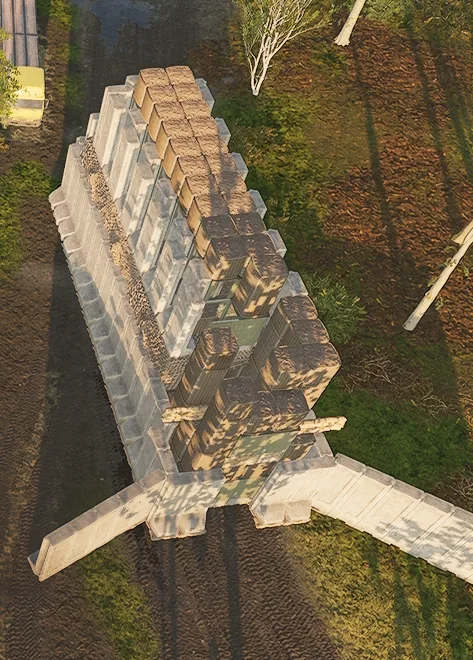
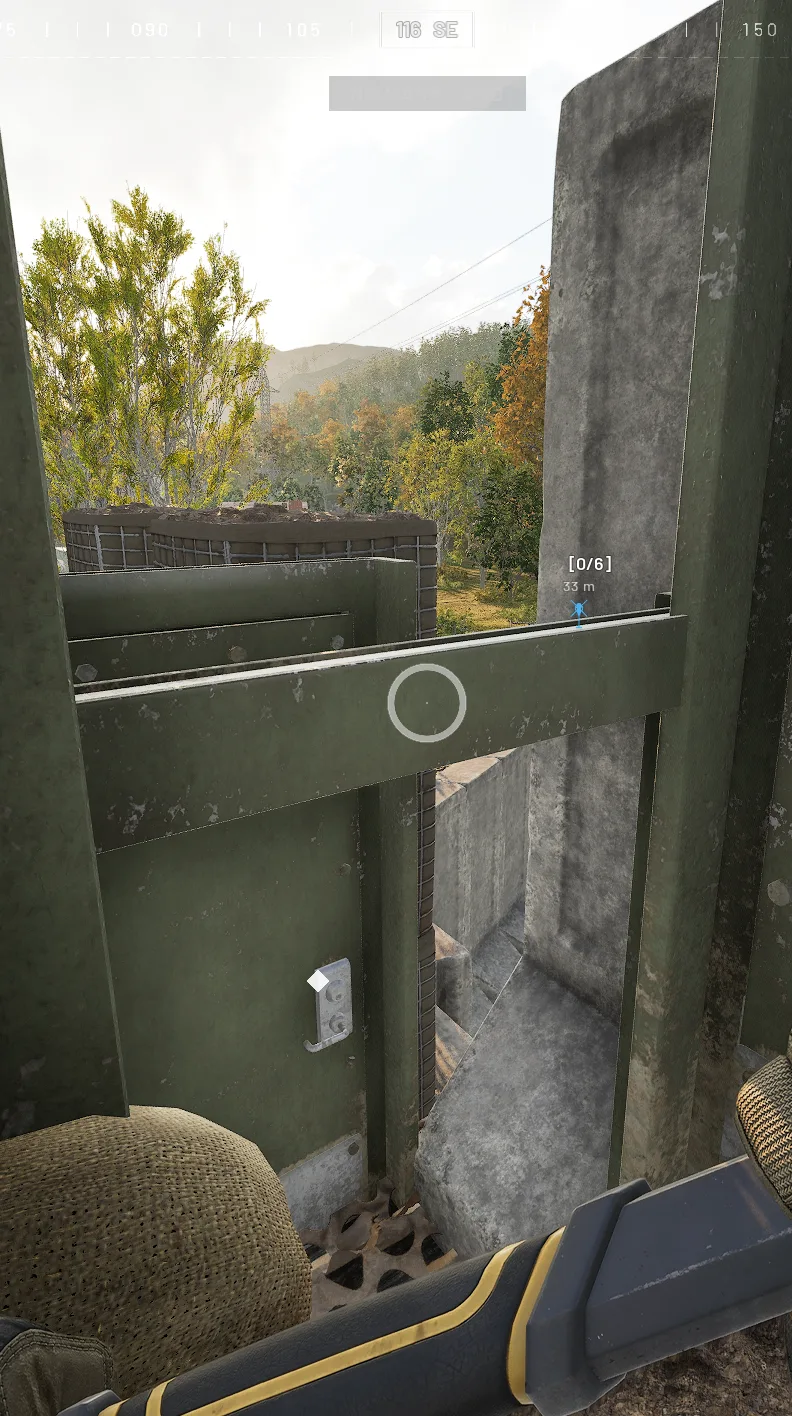
How To Access the Roof:
Stand on the toe of the Bremmer on the right edge of the picture above.
Mantle onto the doorframe of the door with the roof knocked out.
Jump from the doorframe and mantle onto the top of the Bremmer that you started on the toe of.
This access route will exist once the build is complete and can be used to access the roof to complete repairs as well.
Mortar Cover:
Place 20x Small Hescos on top of the door frames of the crenellation hallway.
If your hallway doors are not placed perfectly level, you will have 2 snap points for some of these Small Hescos.
You MUST place the Small Hescos on the lower snap point. Once you place all the Small Hescos, go below into the hallway and make sure that none of them have blocked the hallway with filler sandbags. If they have, remove the blueprint and replace them on the lower snap point to prevent the filler bags.
Place 1x Large Hesco on top of the Non-Jump-Up door Frame.
Base End Build Up:
Place 8x Small Hescos along the tops of the rear walls.
Warning:
If you snap the Small Hescos to the wrong point, you will block the hallway and make the crenellations useless.
Part #2 Stage #2: Crenellations Tank trap Cover & Completing Base end build up
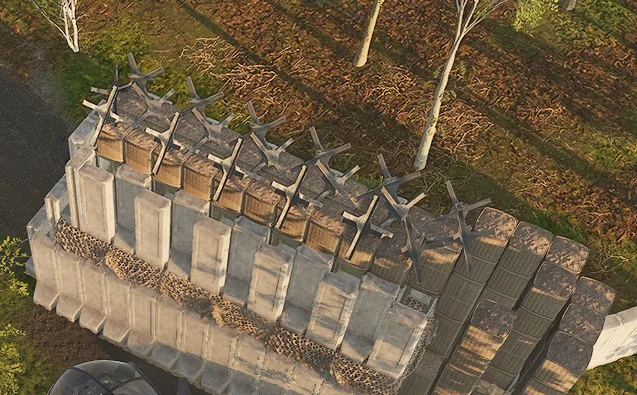
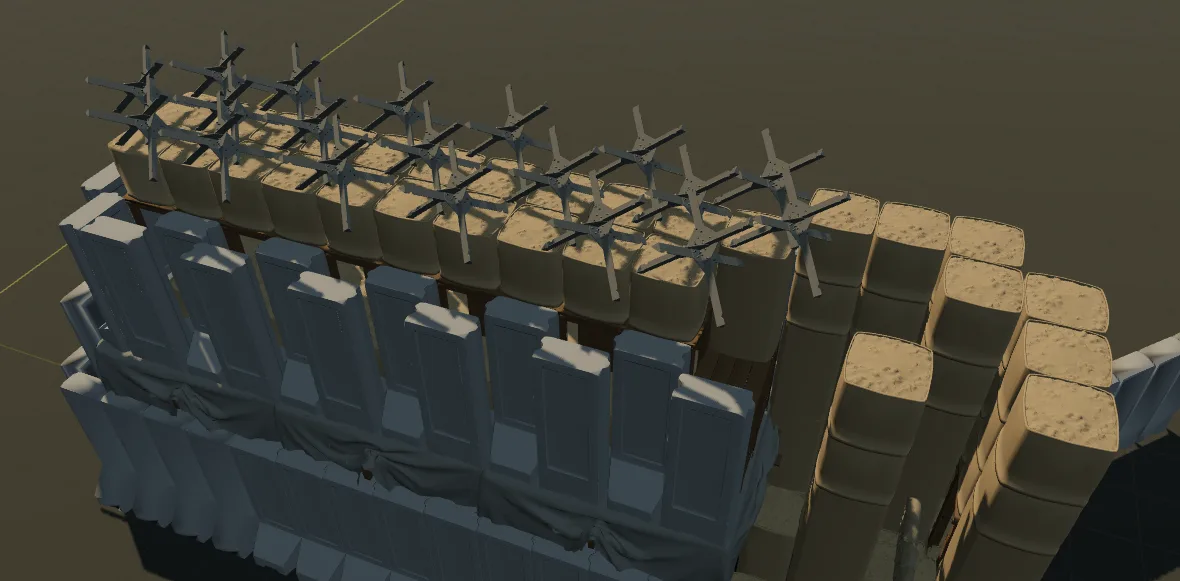
Tank Trap Cover:
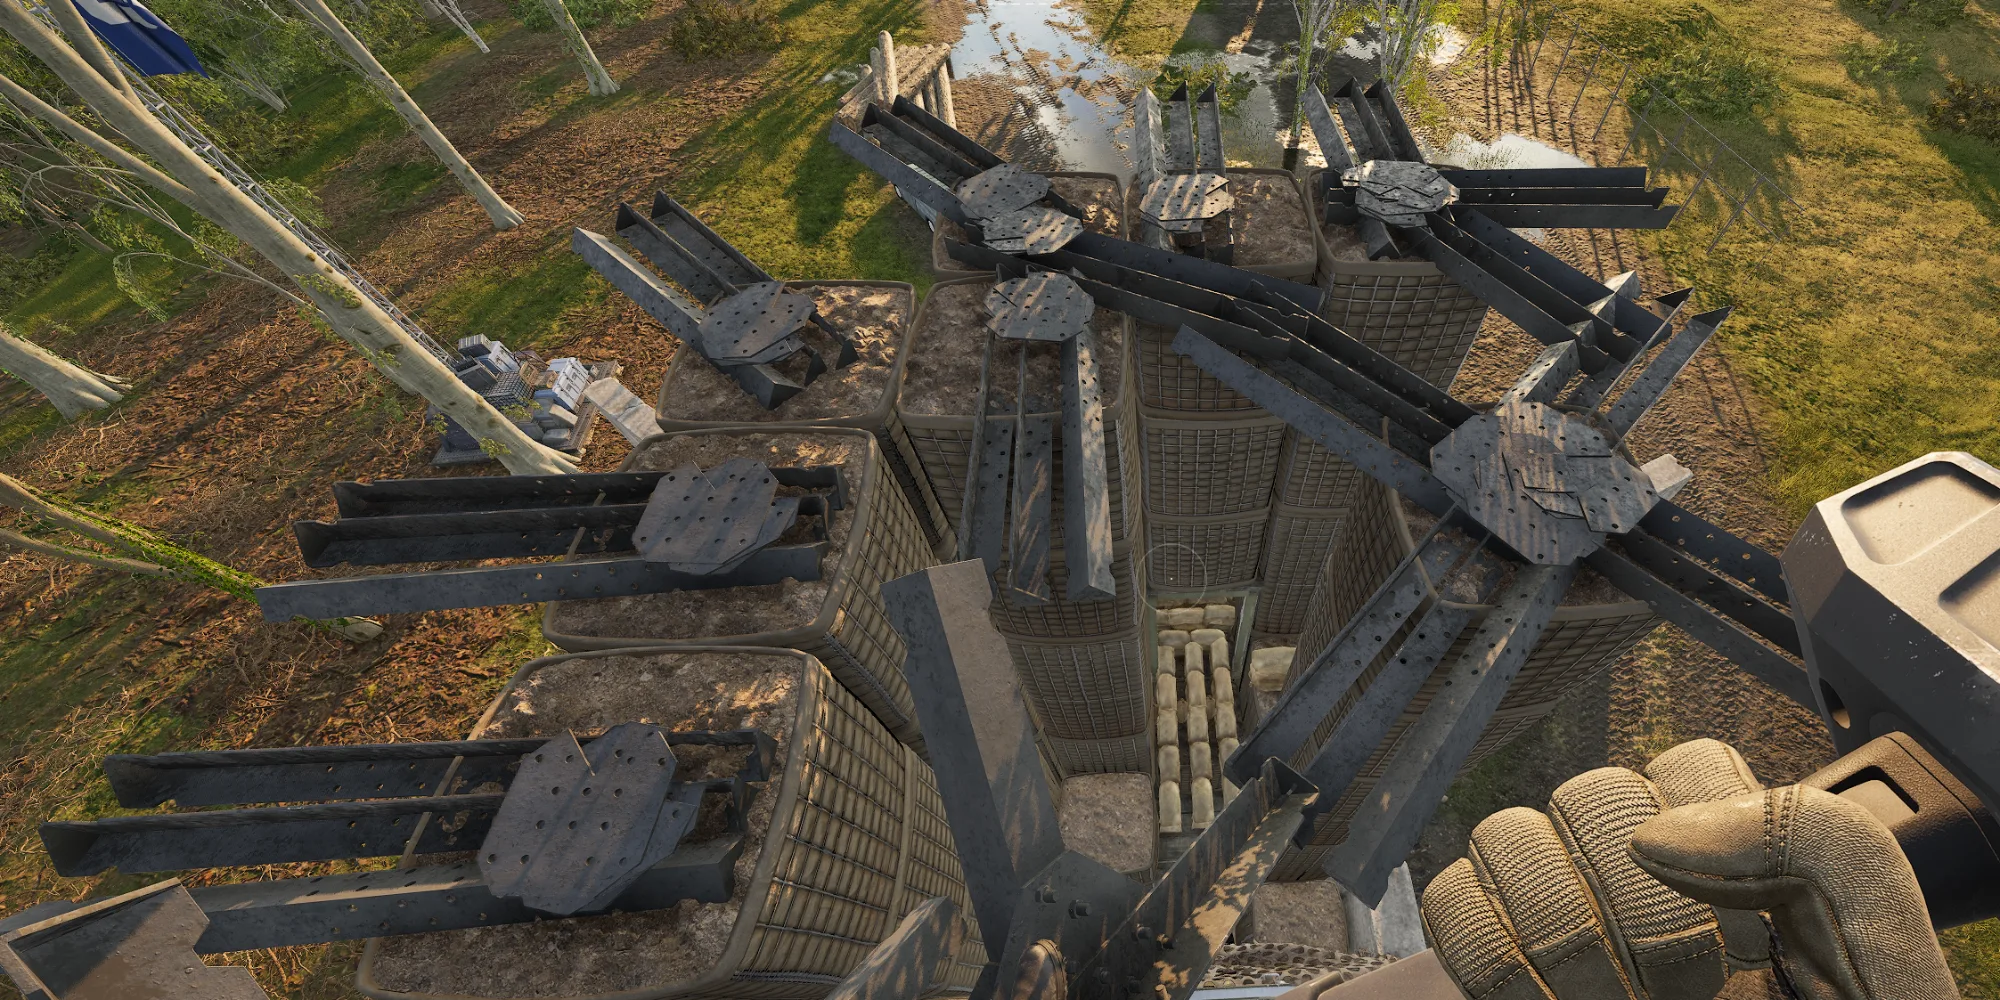
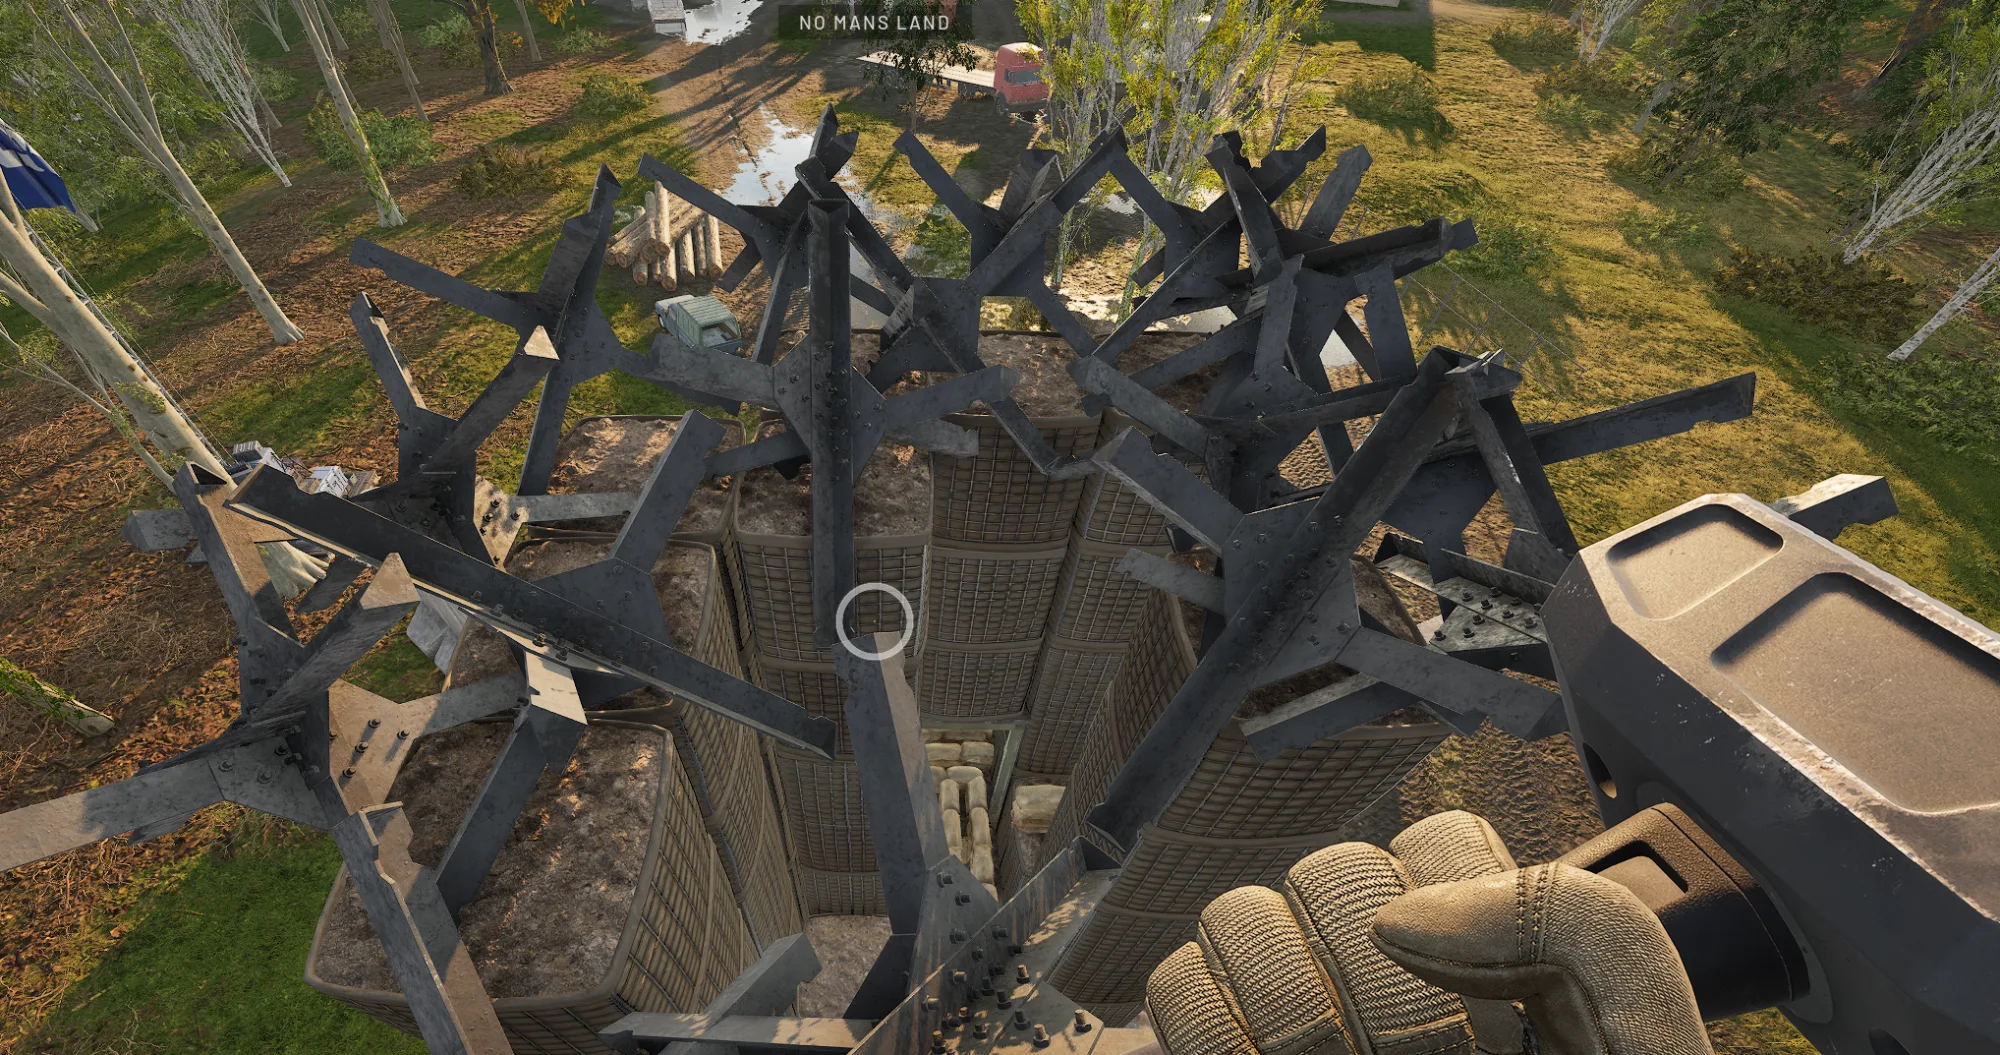
Place at a minimum x19 Tank Traps along the top of the crenellation hallway.
The tank traps must overhang the Bremmer wall Peak Pockets.
The above configuration is the minimum requirement to provide adequate splash damage cover. Go wild and add more if you have the time and resources.
Complete Base End Build Up:
Place x10 Small Hescos along the rim of the base end wall, this will bring it even with the layer above the hallway.
Part #2 Stage #3: Base end tank trap cover
Tank Traps:
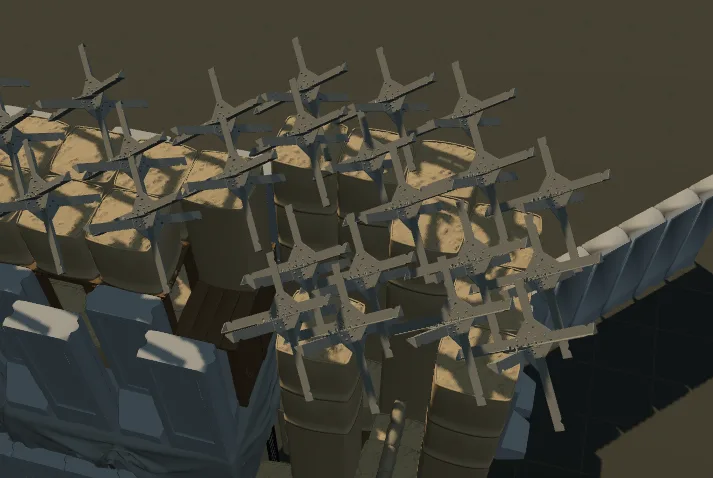
On the Lone Pillar, you must place a tank trap on each corner.
On all others you can place one facing in, one facing out, and one on each projecting corner.
Part #2 Stage #4: Exterior wire, tank traps, & spokes
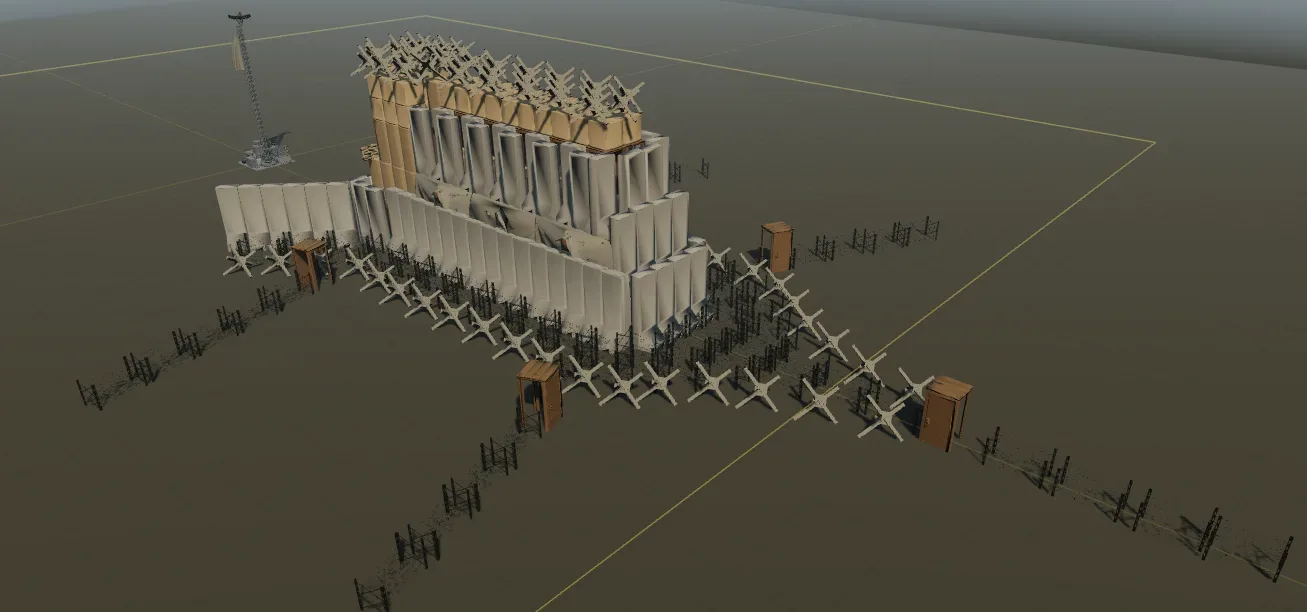
Wire is placed closest to the walls, then tank traps outside of that to prevent the wire from being run over.
Wire:
Place 2 layers all along the walls to provide enough standoff so people can't jump from the tank traps to the toe of the Bremmers.
Place tank traps along the outside of the wire.
Must be placed directly adjacent to the spokes to prevent over spacing.
Maximum spacing should be slightly less than the width of one tank trap.
Place doors at each spoke to allow easy rotation by friendlies.
orient doors so that they provide the minimum amount of cover from our firing positions.
Final touches: Internal Tower Battle Positions
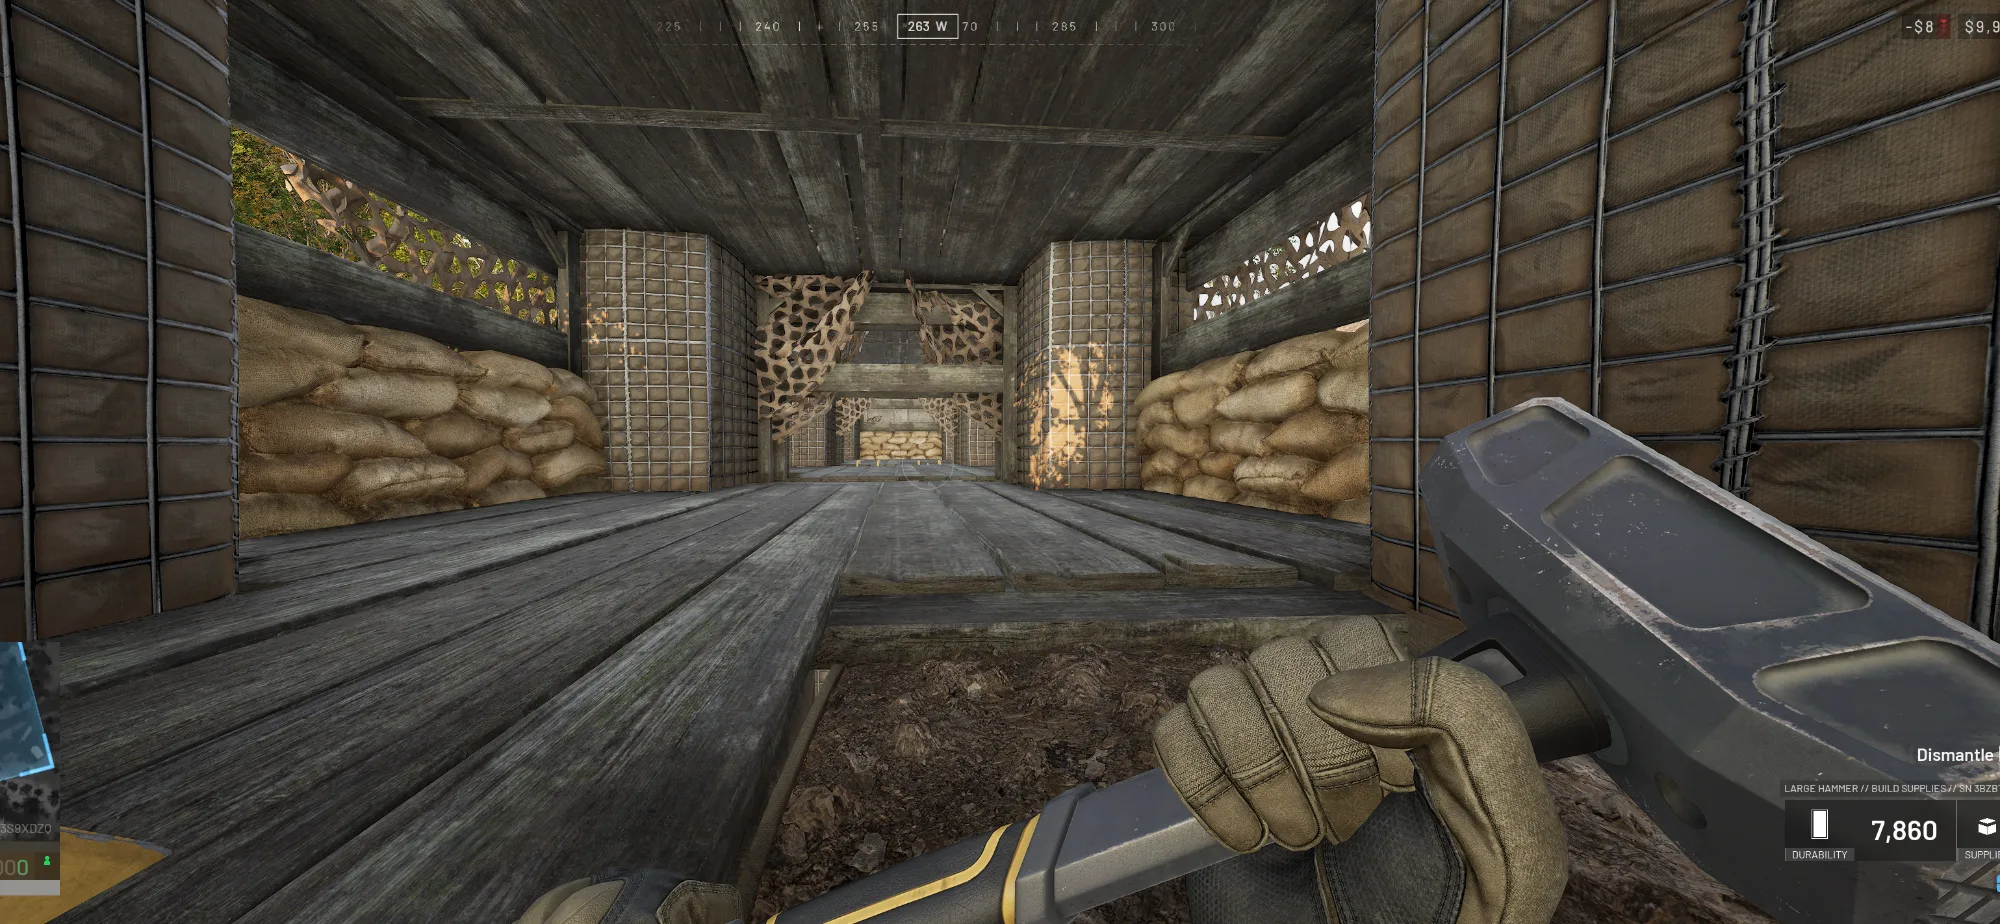
Preparing the Recon Towers:
Remove the Small Hescos adjacent to the ladder.
Remove the sandbags at the meeting faces of the Recon Towers.
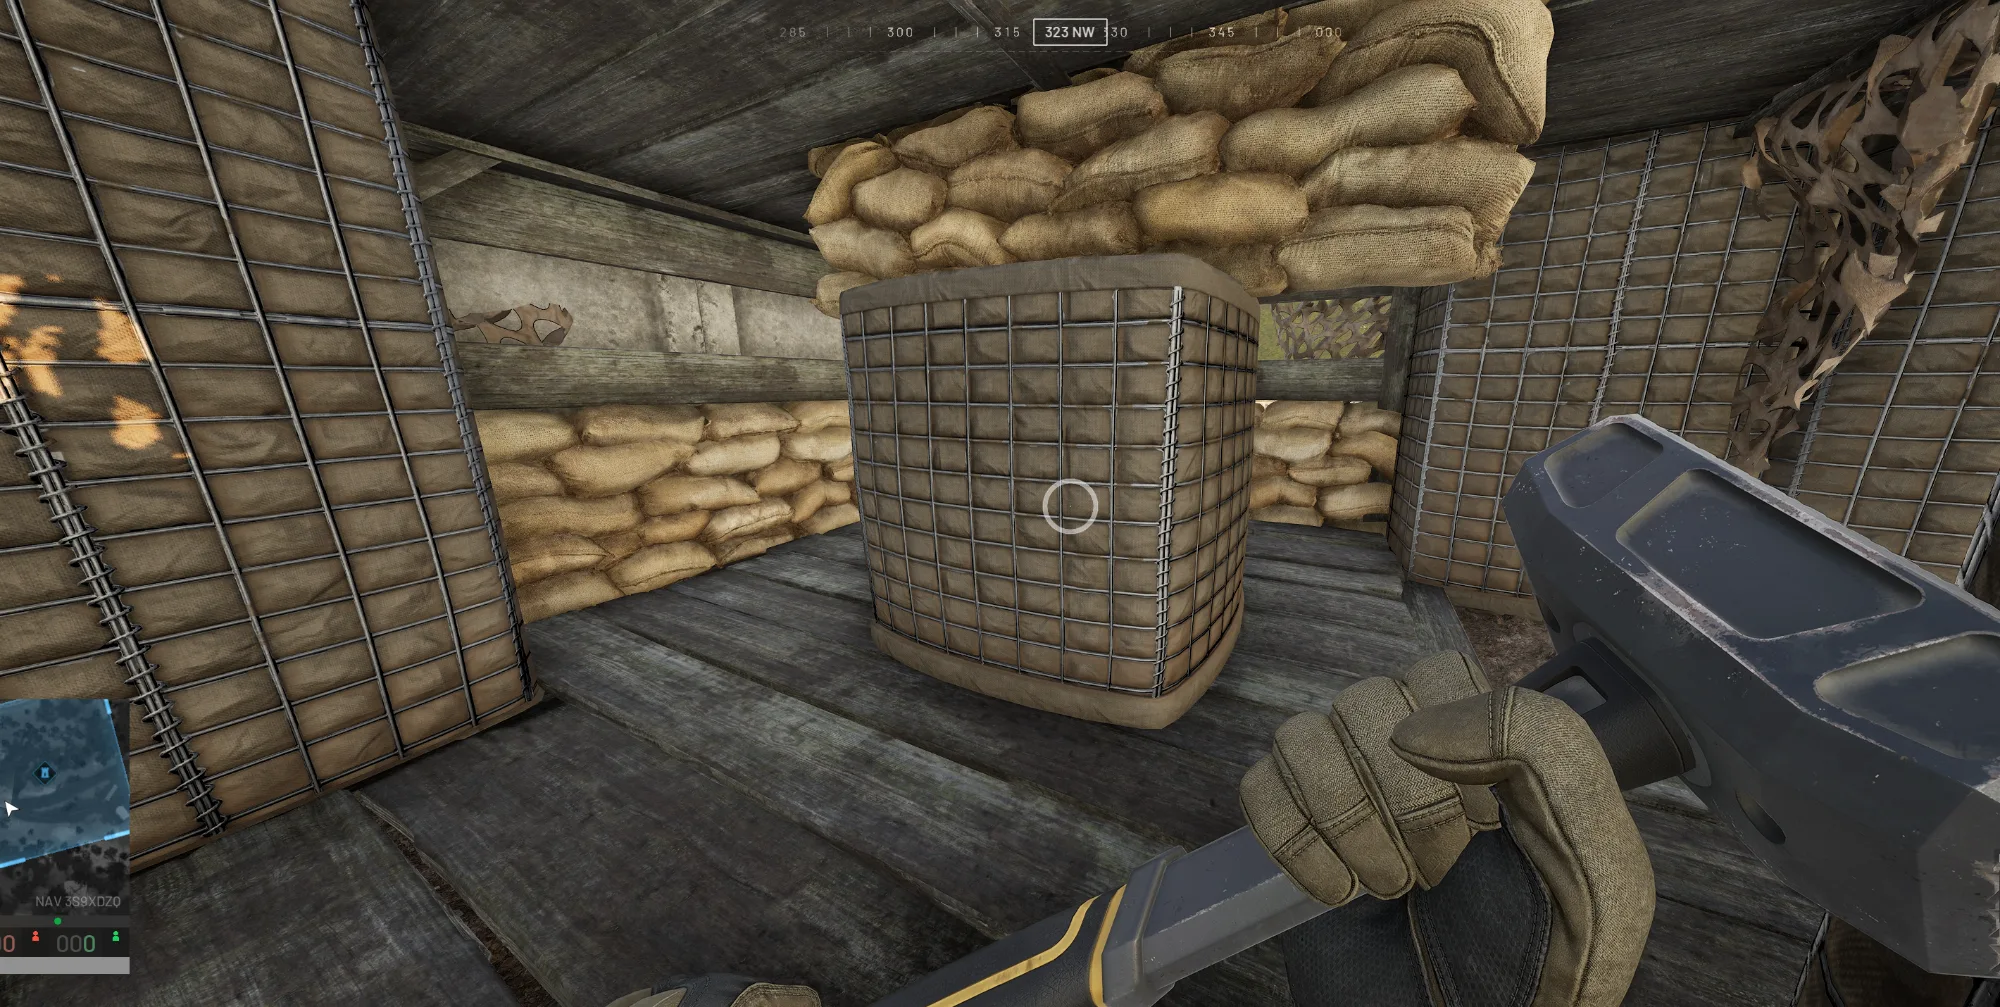
Positions Within the Recon Towers:
Free place a Small Hesco in the center of each Recon Tower.
Place a sandbag snapped to the center of the Small Hesco.
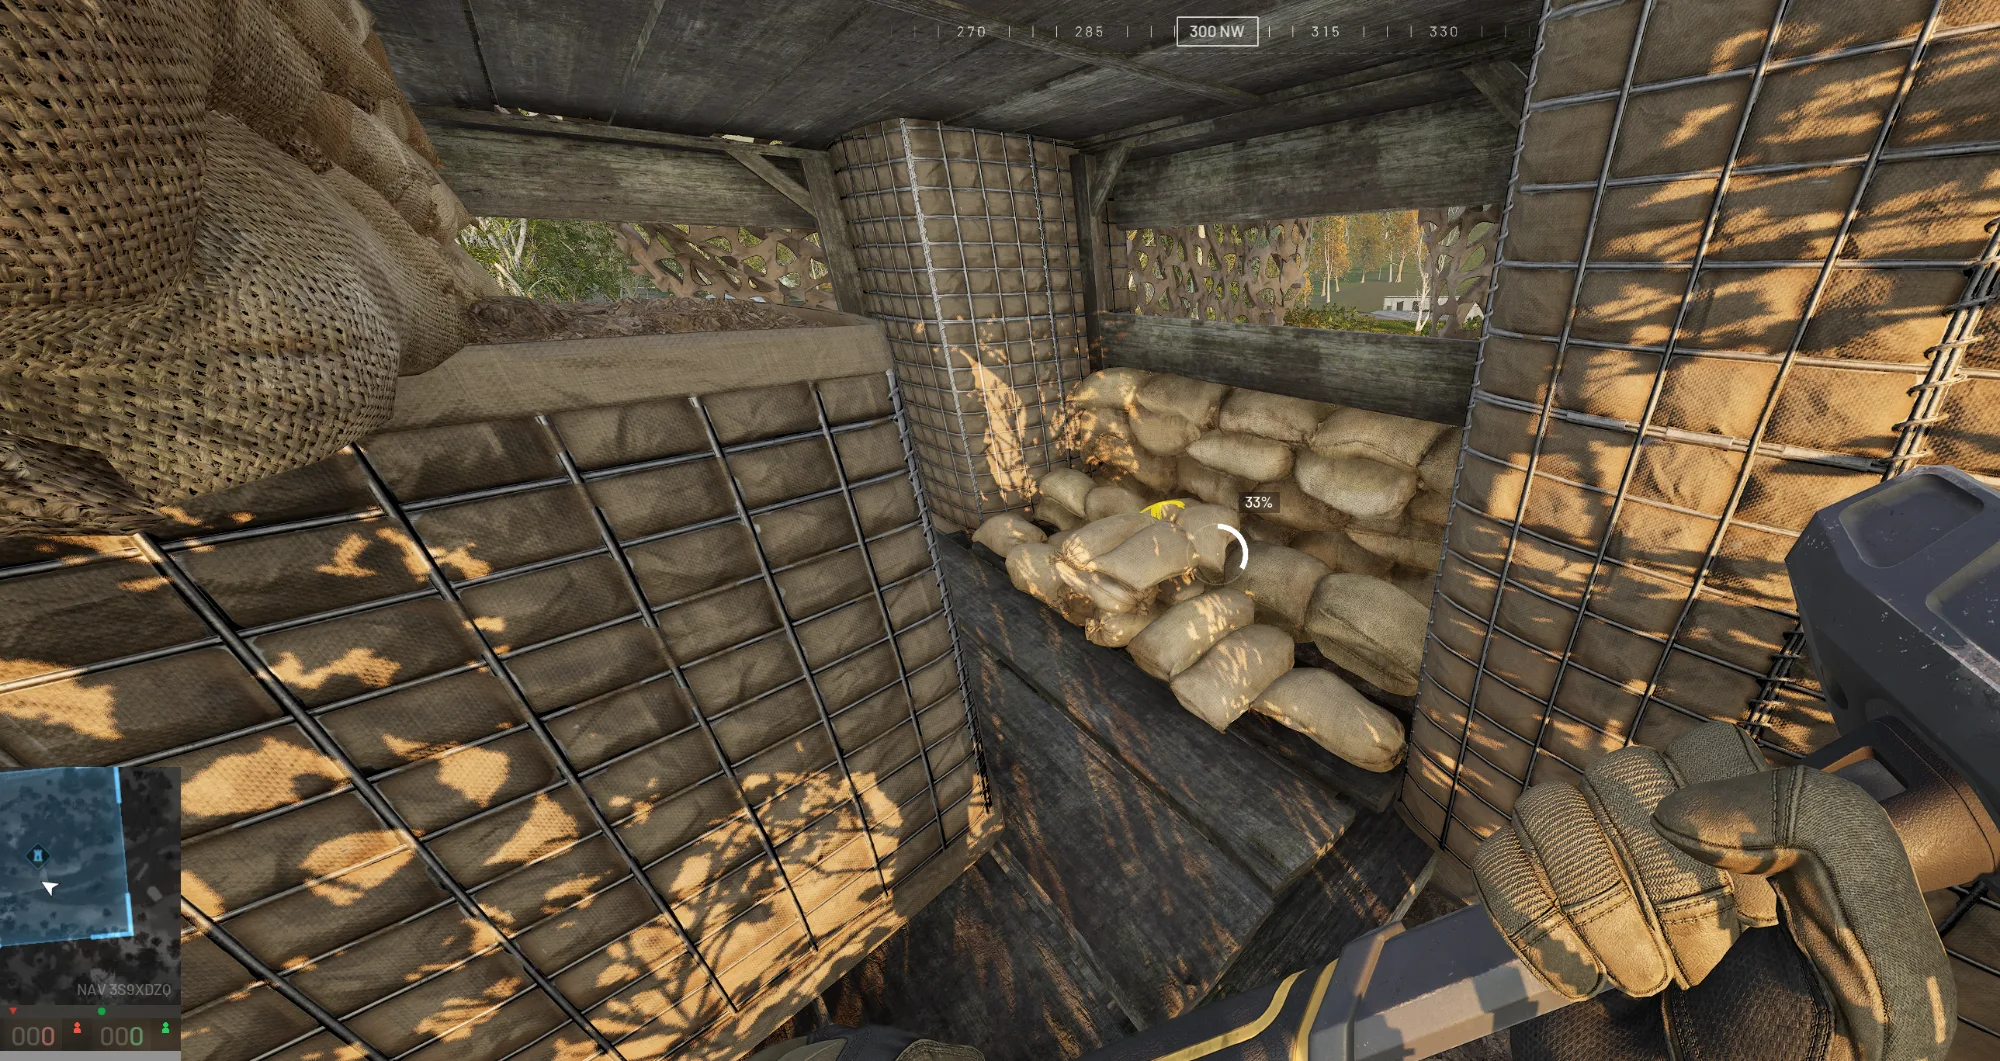
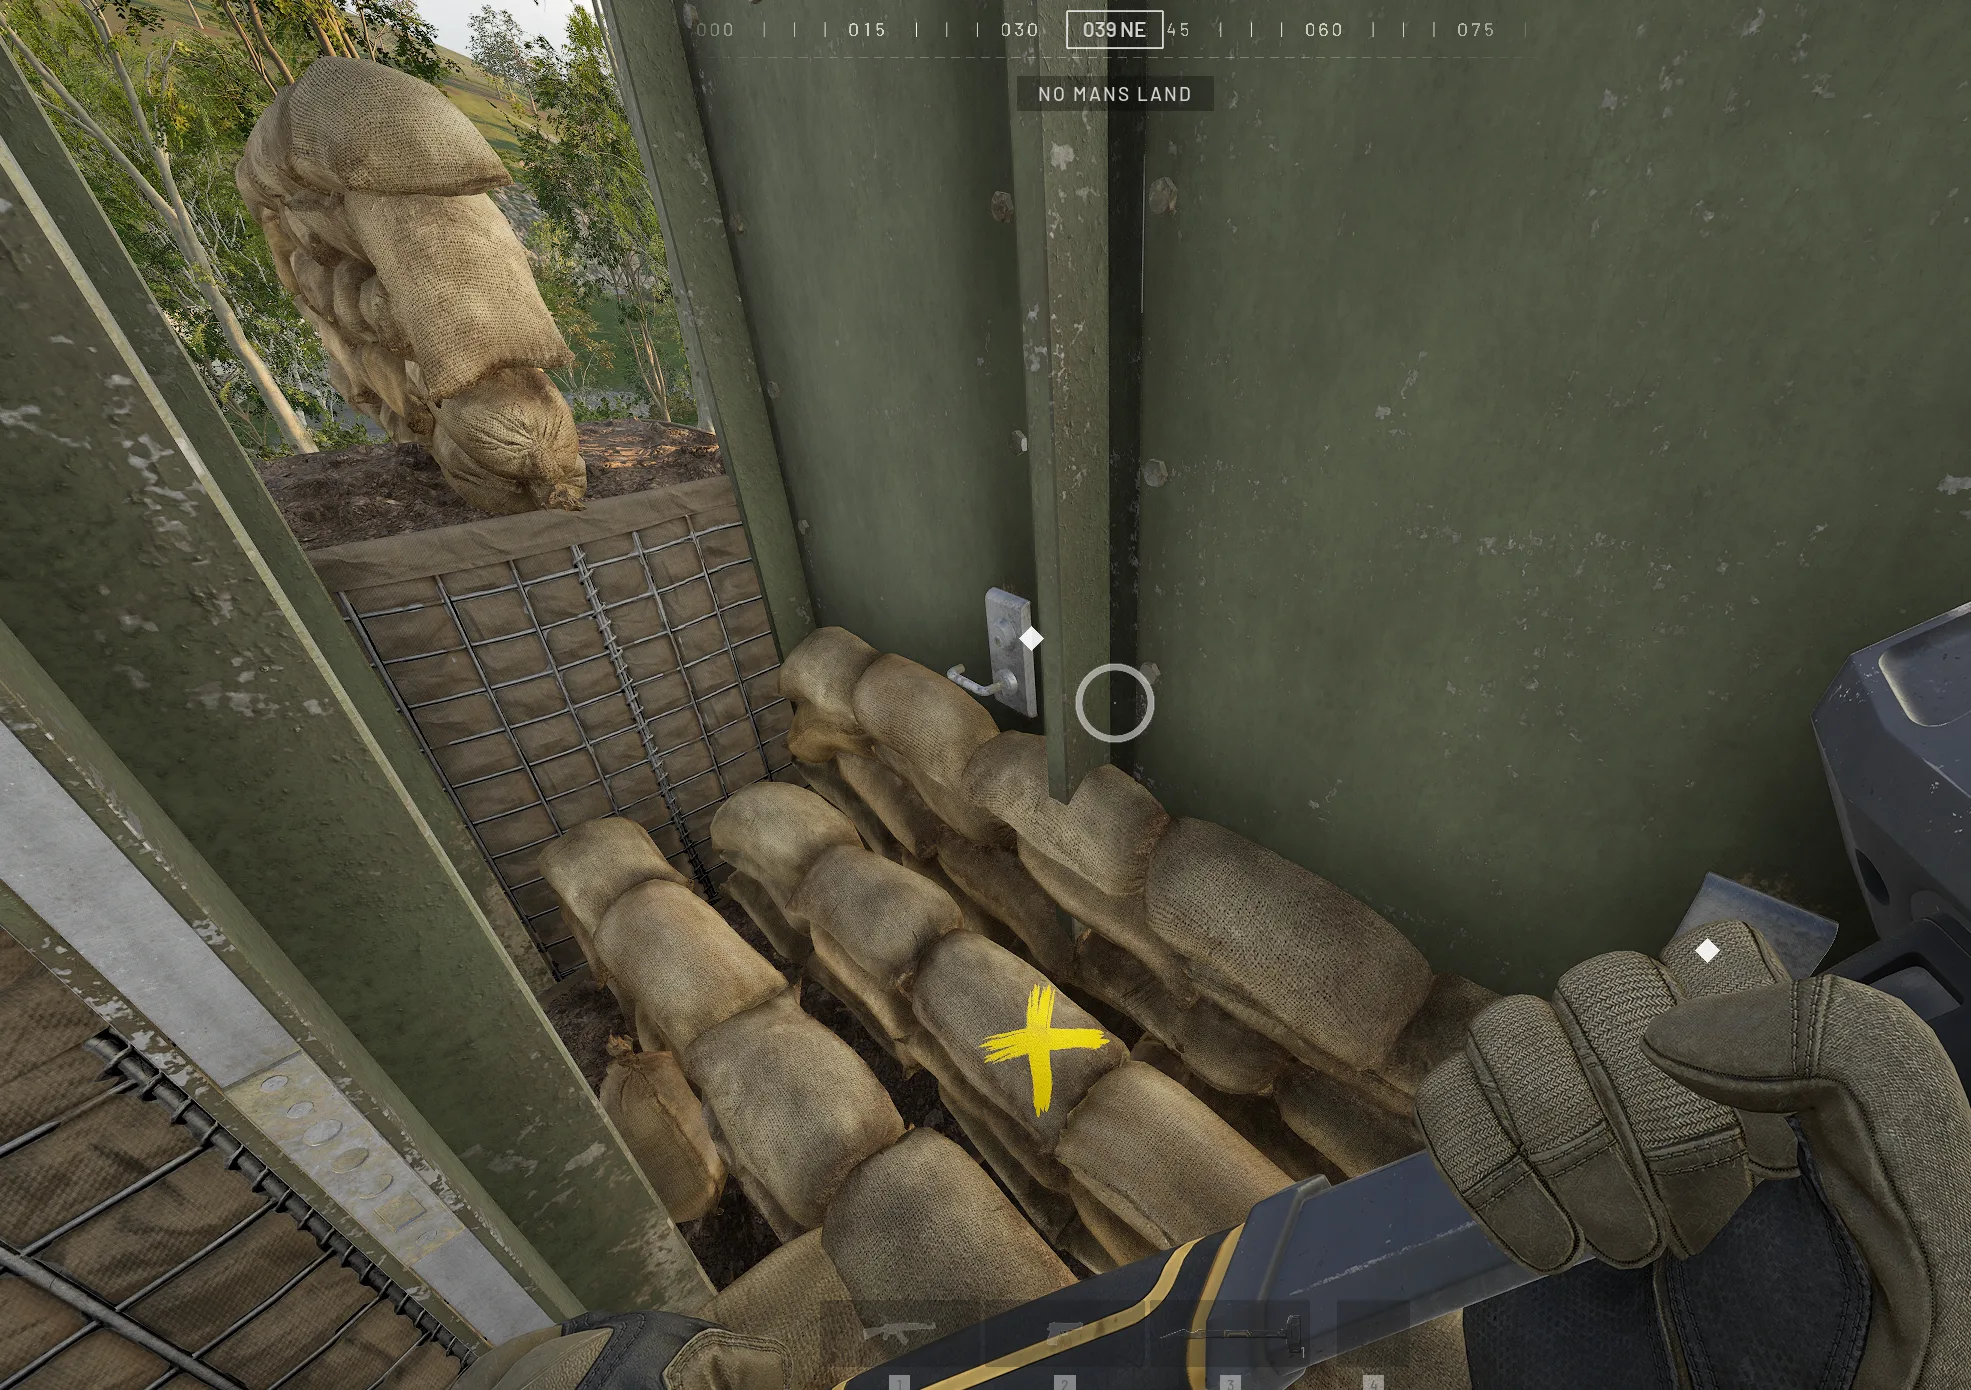
Recon Tower Window Steps:
Free place x2 sandbags below the window.
Partially build the one closest to the outside to 33%, this should be 2-3 hits off the yellow X.
Do not build the one farther from the window.
This configuration will allow you to step up to the window with a higher vantage point for a better downward angle.
If the exterior Bremmers are destroyed, you can complete the build on these for additional protection until repairs can be completed.
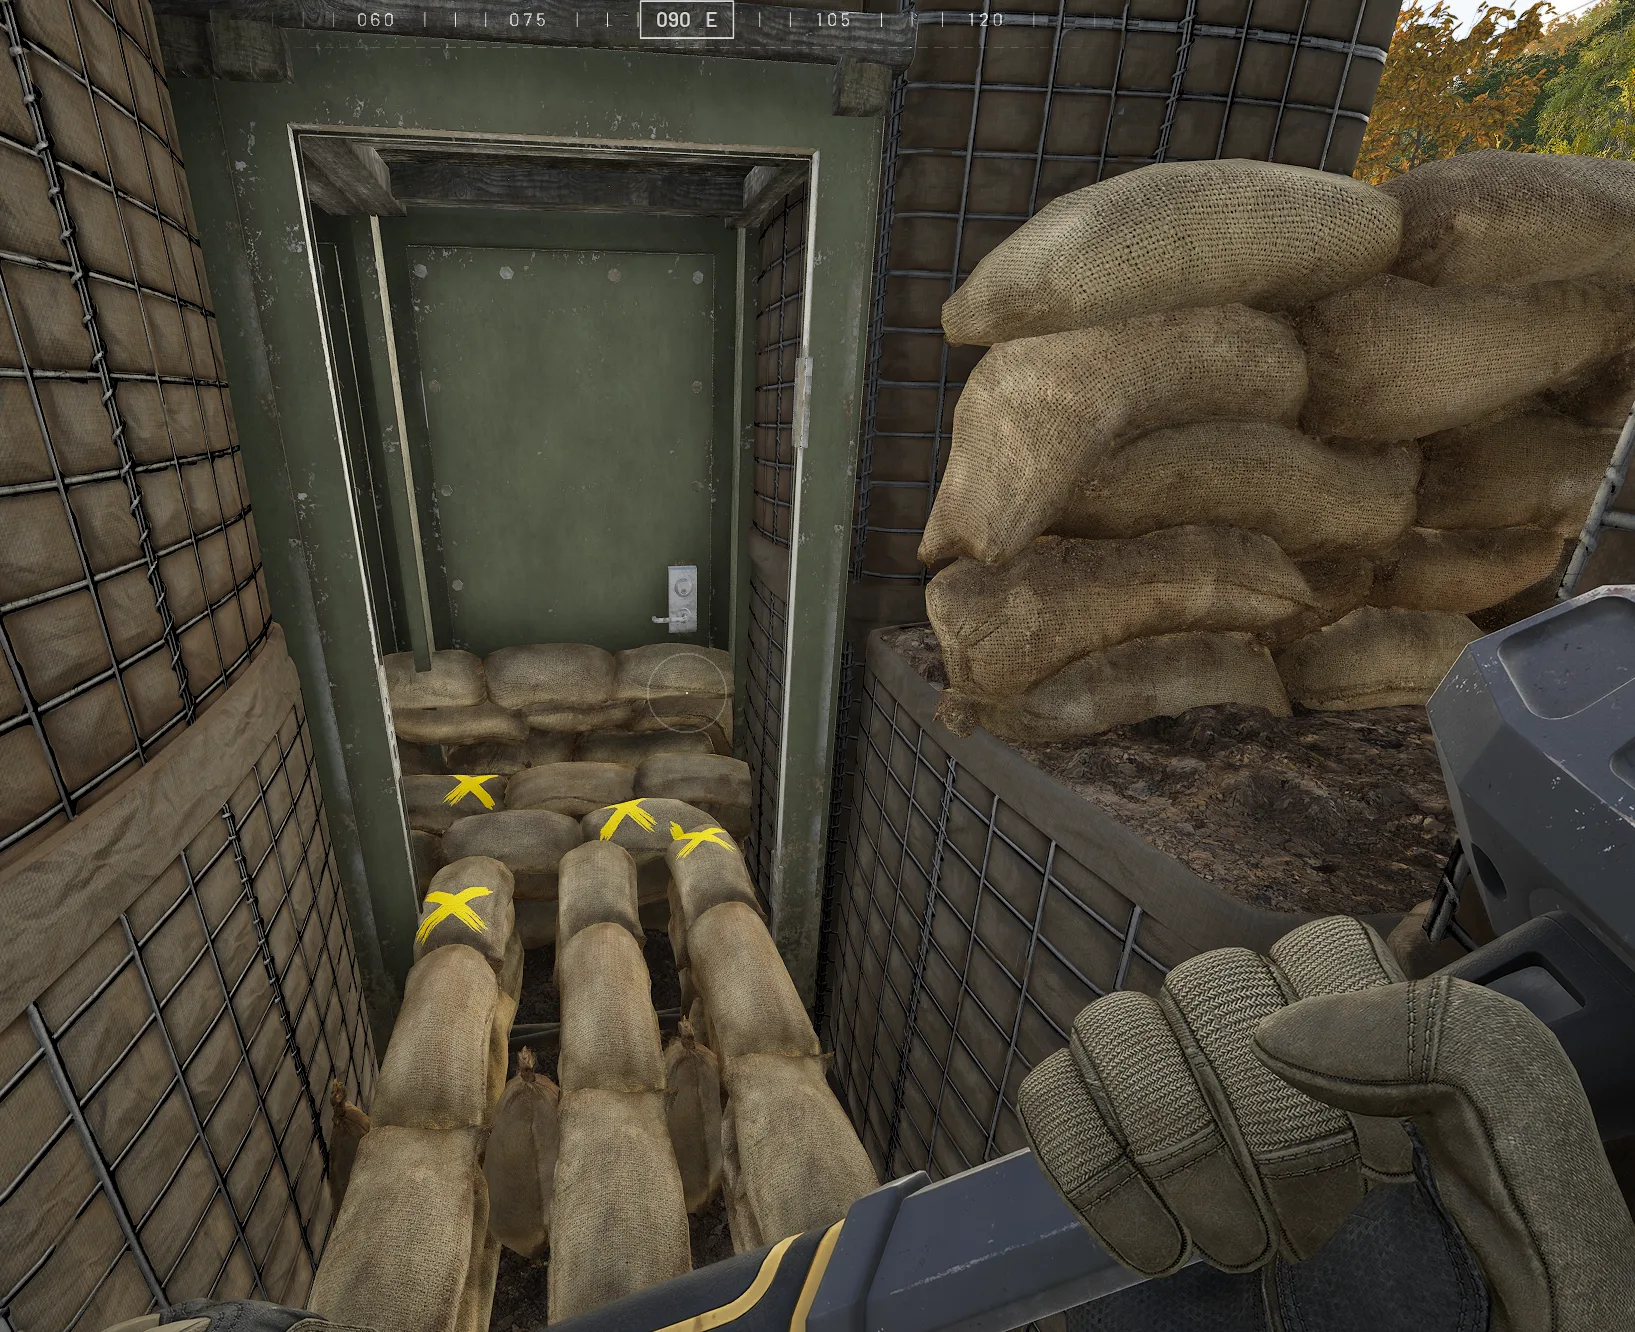
Base End Sandbags:
Place x1 fully built sandbag against the door.
This will provide a firing position into the interior of the base.
Free place x2 fully built sandbags pointed outwards, x1 on top of each of the openings on either side of the tower.
Place additional partially built sandbags along the floor to give better bipod angles for the side shooting positions.
Bastion Entrance Door Sandbags:
Place x1 fully built sandbag on the inside of the door that is not in line with hallway to the ladder.
This will provide an additional firing position into the center of the base that someone can not jump through.
Design Flaws
Towers must all be level
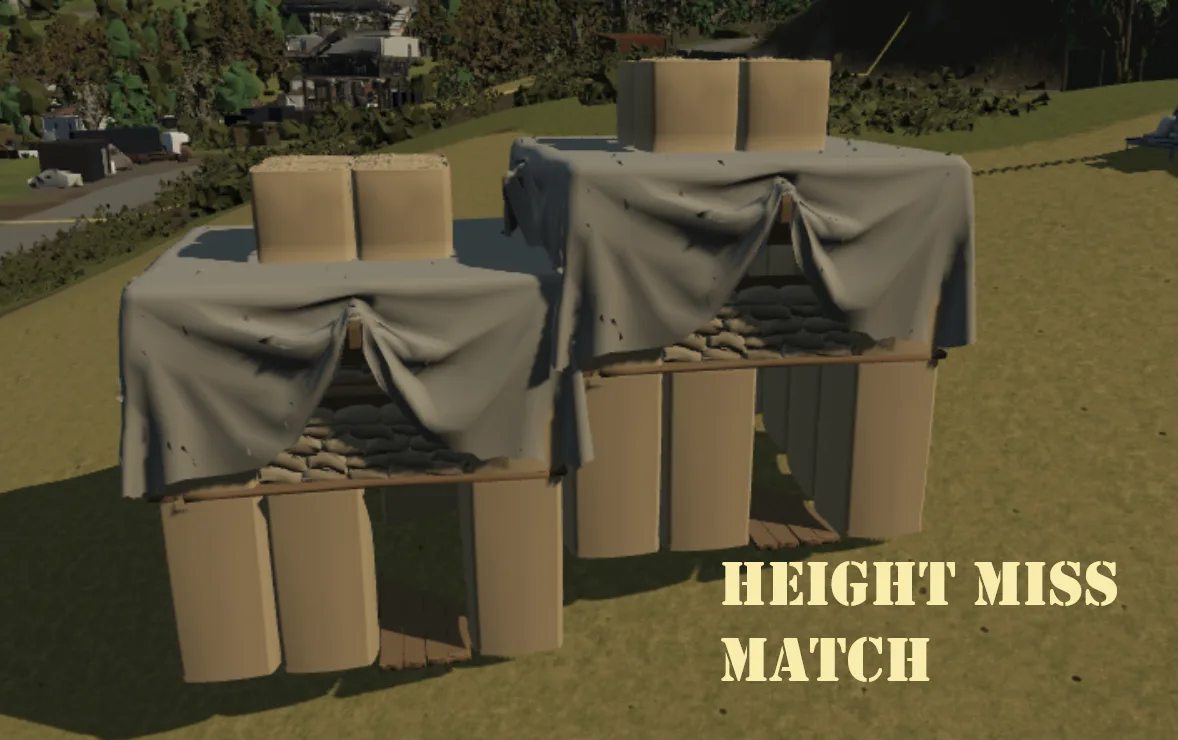
Towers must all be placed on the same height level if you have to crawl under a board to the next tower. If a tower is even a few inches higher or lower than the next it will block your prone crawl.
FIX: Place a 4x Wall Hesco snapped to the Tower side that HAS THE SANDBAG CRAWL THROUGH.
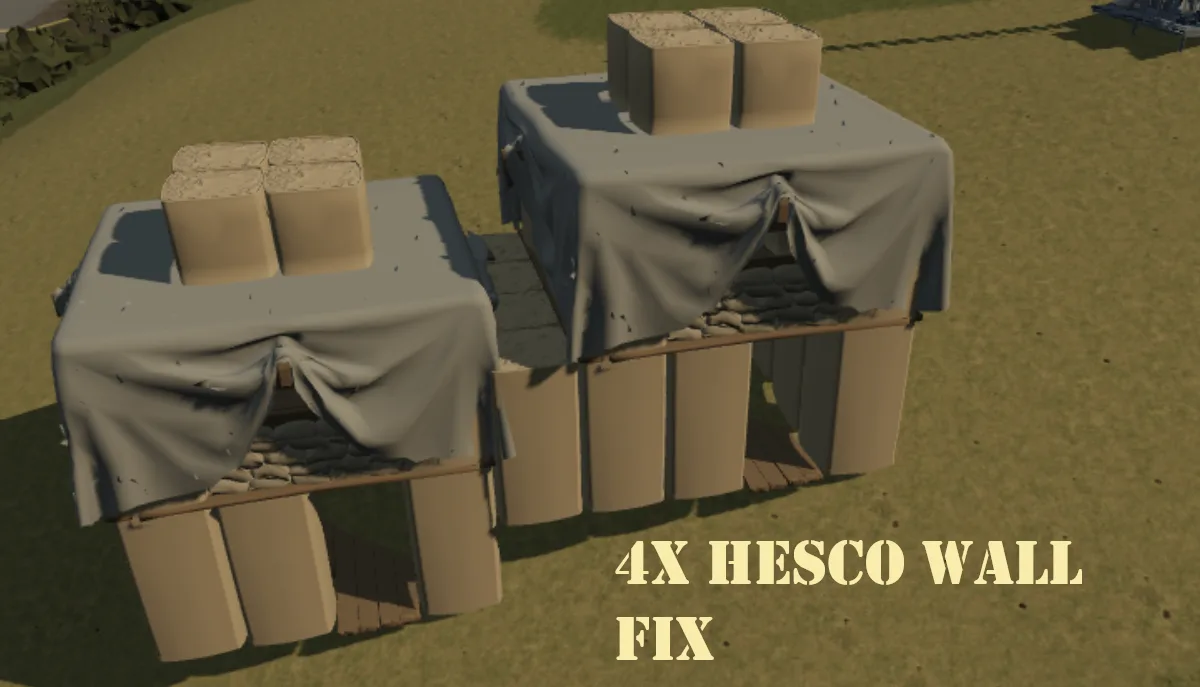
If you have to crawl through a sandbag side on both towers, you must use two 4x Hesco Walls.
One for each tower so you can crawl on the level floor between them.
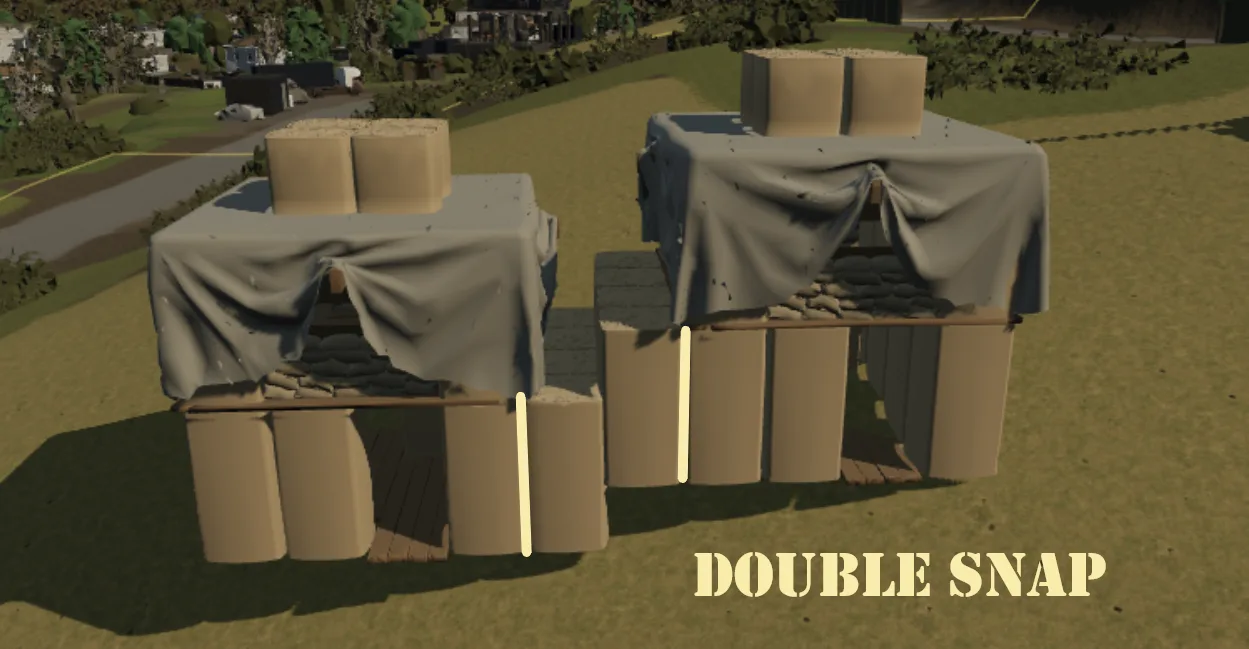
In order to prevent potential clearance issues and simplify the decision making process, it is recommended to use the double spaced configuration in all circumstances.
How to get this training
You can build this in the Training Grounds and grab anyone with a level FOB Intermediate as well as a Senior Instructor.
You can also attend a "Stupid Simple Bastion" training class to receive it.
You can find trainings running in the https://siegedogs.com/events
Discussion
- No comments yet. Corrections and after-action notes welcome.
Sign in as a clan member to comment.